
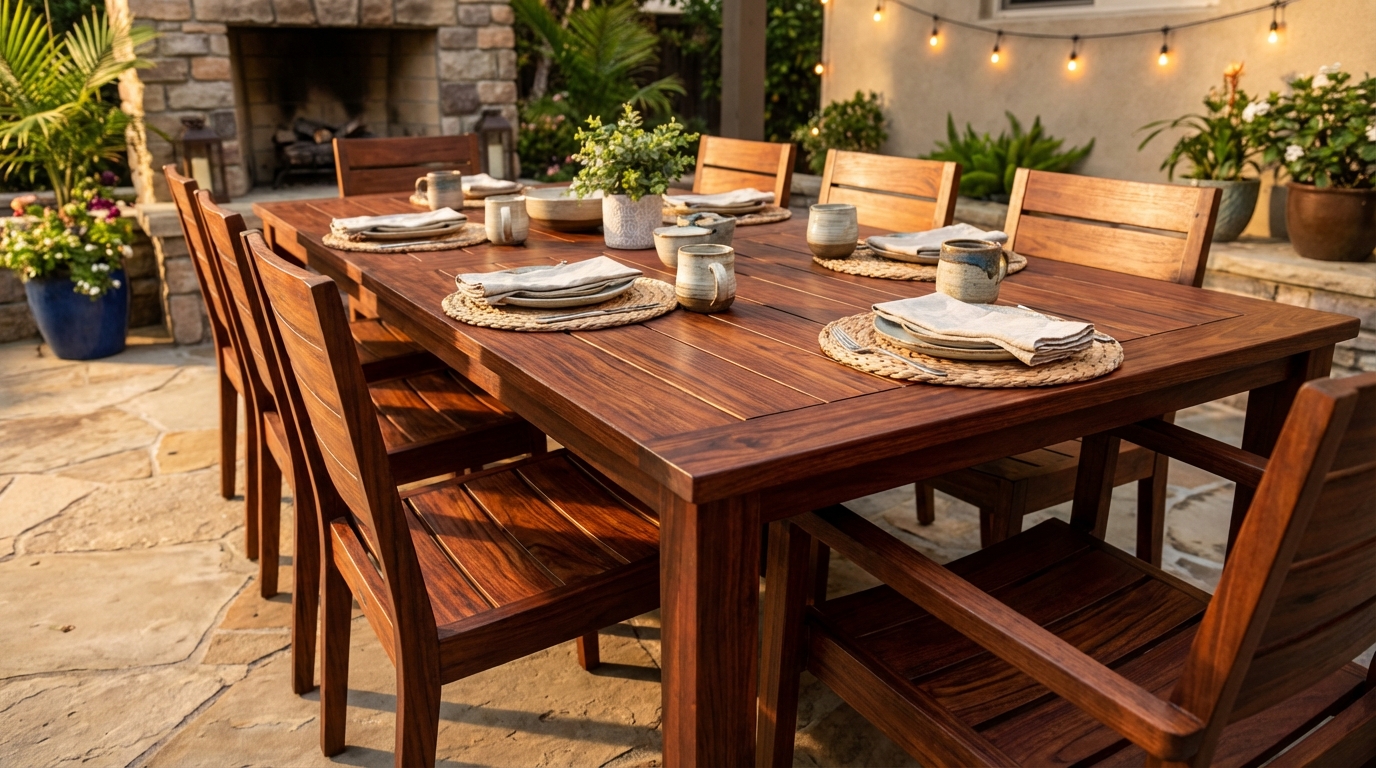
Inconsistent mass production colors often lead to rejected shipments and brand damage. Don’t let poor staining processes ruin your inventory and profits. Here is the definitive industrial guide for professional results.
To learn how to stain outdoor wood furniture at scale, you must maintain 8-12% moisture content, choose between oil or water-based systems based on wood species, and apply electrostatic spray techniques to ensure uniform penetration and long-term durability across entire production runs.
I. Set Clear Standards Before Staining Outdoor Furniture
Establishing industrial standards for how to stain outdoor wood furniture requires a deep understanding of chemical compatibility and factory-level precision. High-volume manufacturing demands automated systems that replicate hand-rubbed quality while maintaining rigorous speed and output requirements. Implementing these standards ensures that every piece leaving the factory meets the high expectations of global B2B buyers.
Defining Technical Parameters for Scale
Professional factories must define strict technical parameters for temperature, pressure, and application speed to maintain a competitive edge. These parameters serve as the foundation for the entire finishing line, preventing the variability that often plagues smaller operations. By standardizing these variables, manufacturers can guarantee a level of finish consistency that is vital for large-scale retail contracts.
Global Compliance and Chemical Safety
We prioritize international safety standards to ensure that all finishing materials are non-toxic and environmentally friendly for global distribution. Many regions have strict VOC (Volatile Organic Compounds) regulations that necessitate the use of specific industrial stain formulations.
Specifically, we focus on:
- Compliance with REACH and RoHS standards for chemical safety.
- Low-VOC certifications to meet European and North American environmental laws.
- UV-resistance testing to prevent premature fading in harsh outdoor environments.
Think about this for a second.
Standardizing the Industrial Workflow
The industrial workflow must be meticulously documented to ensure that every worker follows the exact same sequence of operations. This documentation includes detailed SOPs for mixing stains, cleaning equipment, and monitoring the application environment in real-time.
The table below summarizes the core standards for industrial wood staining.
| Standard Category | Technical Requirement | B2B Impact |
|---|---|---|
| Application Method | Electrostatic Spray or Auto-Dip | Uniformity and Material Efficiency |
| Chemical Safety | Low-VOC / REACH Compliant | Legal Access to Global Markets |
| Finish Durability | 500+ Hour UV Exposure Test | Reduced Warranty Claims and Returns |
Key Takeaway: Establishing rigorous industrial standards is the first step in eliminating the variables that cause costly color mistakes in mass-produced outdoor furniture.
And that is just the beginning.
II. Control Moisture Content Before Applying Stain
Managing moisture content is the most critical technical factor when determining how to stain outdoor wood furniture for maximum adhesion. We mandate a target moisture content of 8-12% for all timber to ensure that the wood fibers are stable enough to receive and hold the industrial stain pigments. This range is the industry “sweet spot” that prevents the wood from being too dry (causing brittleness) or too wet (causing finish peeling).
Kiln Drying and Equilibrium Moisture Content
Every piece of timber must undergo a controlled kiln-drying process to reach the required equilibrium moisture content before it enters the staining line. This process removes the free and bound water within the wood cells, significantly reducing the risk of warping or cracking after the finish is applied. Maintaining a furniture factory audit checklist helps monitor these kiln logs to verify that drying protocols are strictly followed for every batch.
Digital Verification of Moisture Levels
Our quality control teams use calibrated digital moisture meters to test multiple points on every component before the staining process begins. If the moisture content falls outside the 8-12% window, the components are returned to the drying room to prevent future adhesion failures.
Consider the following steps:
- Calibrate digital meters daily against a known standard.
- Measure moisture at the core of the wood, not just the surface.
- Record all readings in a digital log for batch traceability.
But wait, there’s more.
Preventing Post-Stain Movement
Staining wood with incorrect moisture levels causes the grain to “raise” or the wood to “bleed” oils, both of which ruin the aesthetic appeal of the furniture. By hitting the 8-12% target, we ensure the wood is dimensionally stable, meaning the joints will remain tight and the finish will not crack as the furniture moves between different climates.
The table below compares the risks of staining wood at different moisture levels.
| Moisture Level | Outcome A (Stain Performance) | Outcome B (Structural Integrity) |
|---|---|---|
| Below 8% | Excessive absorption leads to dark, blotchy colors. | High risk of wood becoming brittle and splitting. |
| 8% – 12% (Ideal) | Uniform penetration and perfect color match. | Maximum stability and joint durability. |
| Above 15% | Poor adhesion; stain will eventually peel or flake. | High risk of warping, mold growth, and rot. |
Key Takeaway: Strict adherence to the 8-12% moisture content rule is non-negotiable for producing high-quality outdoor furniture that survives global shipping and varied climates.
It gets even better.
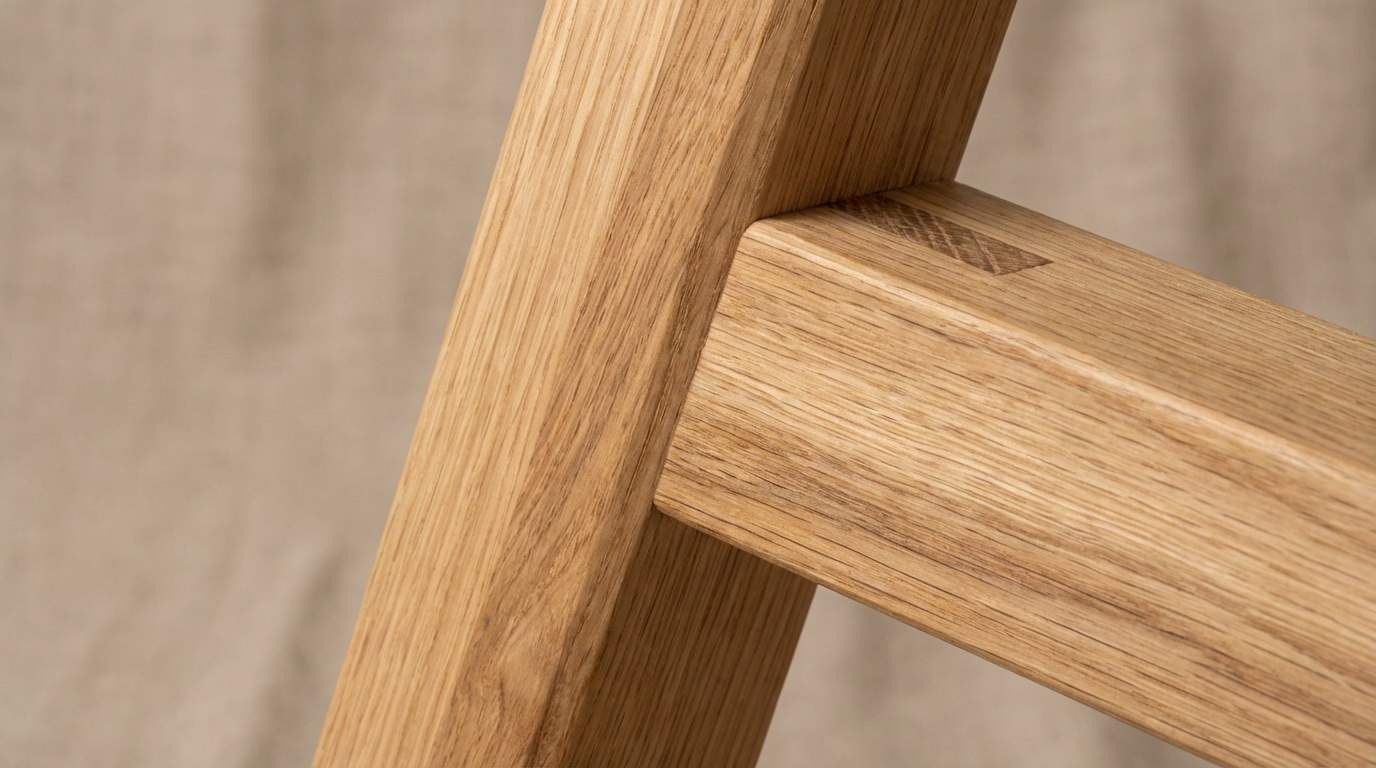
III. How Different Outdoor Furniture Woods Absorb Stain
Choosing the right wood species is a fundamental decision when planning how to stain outdoor wood furniture for a specific market aesthetic. Different species like Acacia, Eucalyptus, and Oak have vastly different cellular structures, which dictates how deeply the stain will penetrate and how the final color will appear. Understanding these absorption rates allows manufacturers to adjust stain viscosity and application times to achieve a consistent look across different material types.

The Density Challenge of Acacia Wood
Acacia is a popular choice for outdoor furniture due to its high density and natural oils, but these same traits make it challenging to stain uniformly. The tight grain of Acacia requires a thinner stain with high pigment density to ensure the color isn’t just sitting on the surface where it can easily scratch off.
We recommend these specific approaches:
- Use a pre-stain conditioner to open the tight pores of the wood.
- Apply stain in thinner, multiple coats rather than one heavy layer.
- Select stains with high-grade trans-oxide pigments for better penetration.
Here is the kicker.
Comparing Eucalyptus and Oak Finishes
Eucalyptus typically has a more uniform grain than Acacia, allowing for a faster staining process with fewer color variances between individual slats. Oak, while beautiful, features large open pores that can swallow stain inconsistently if not properly managed with specialized fillers or industrial sealants.
The table below summarizes the absorption characteristics of common B2B outdoor woods.
| Wood Species | Density Level | Absorption Rate | Recommended Stain System |
|---|---|---|---|
| Acacia | Very High | Low | Solvent-based penetrating oil |
| Eucalyptus | Medium-High | Medium | Water-based acrylic stain |
| Oak | High | High (Porous) | High-solid content stains |
Key Takeaway: Matching the stain chemistry to the specific absorption rate of the wood species is essential for preventing blotchiness and ensuring color longevity.
Does this make sense?
IV. Using Oil-Based Stains for Outdoor Furniture
Learning how to stain outdoor wood furniture with oil-based systems is vital for products destined for extremely dry or high-UV environments. Oil-based stains penetrate deep into the wood fibers, replenishing natural oils that are lost during the kiln-drying process and providing a flexible barrier against the elements. This deep-penetration characteristic makes oil-based finishes particularly effective for dense hardwoods that might reject surface-level water-based coatings.
The Role of Linseed and Tung Oils
Industrial oil stains often utilize a blend of Linseed or Tung oils because they offer superior weather resistance and a classic, warm aesthetic. These oils oxidize when exposed to air, creating a durable, water-repellent finish that enhances the natural beauty of the wood grain without creating a plastic-like film.
Our factory team focuses on:
- Ensuring 100% coverage on all end-grain sections to prevent water wicking.
- Maintaining a consistent temperature in the spray booth to manage oil viscosity.
- Allowing extended flash-off times to prevent “weeping” of the oil from the wood pores.
You might be wondering why.
Application Advantages of Oil Systems
Oil-based systems are often more forgiving during the application phase because they have a longer “open time,” allowing workers to wipe away excess stain and blend colors more effectively. This is a massive advantage in mass production where slight timing variations in the conveyor line can lead to lap marks in faster-drying water-based systems.
The table below compares different oil-based stain additives used in industrial settings.
| Additive Type | Function | Primary Benefit |
|---|---|---|
| UV Inhibitors | Reflects harmful solar radiation | Prevents wood graying and silvering |
| Trans-oxide Pigments | Provides deep, rich color | Superior clarity and fade resistance |
| Fungicides | Prevents mold and mildew growth | Essential for humid, tropical climates |
Key Takeaway: Oil-based systems offer the deepest protection and most traditional look, making them the preferred choice for premium hardwood outdoor furniture.
The plot thickens.
V. When Water-Based Stains Work Better Outdoors
Modern advancements have revolutionized how to stain outdoor wood furniture using eco-friendly water-based acrylic and urethane systems. These coatings dry significantly faster than oil-based alternatives, which dramatically increases factory throughput and reduces the physical footprint required for drying racks. Furthermore, water-based stains are non-flammable and have much lower VOC levels, making them the preferred choice for brands focusing on sustainability and worker safety.
Managing Grain Raise in Water Systems
One of the primary technical hurdles of water-based stains is their tendency to “raise the grain,” which can leave the furniture feeling rough to the touch if not properly addressed. To counter this, our production line includes a “de-nibbing” station where fine-grit abrasives remove the raised fibers after the first coat has dried.
Key technical requirements include:
- Using stainless steel spray equipment to prevent corrosion from the water-based chemicals.
- Implementing high-velocity air movement in drying tunnels to speed up evaporation.
- Applying a dedicated water-based sealer to lock in the color and provide a smooth feel.
Make no mistake about it.
Color Retention and UV Protection
Water-based stains generally offer superior color retention compared to oil-based systems because they do not yellow or darken as they age. This makes them ideal for lighter wood tones or gray-wash finishes that are currently trending in the modern outdoor furniture market.
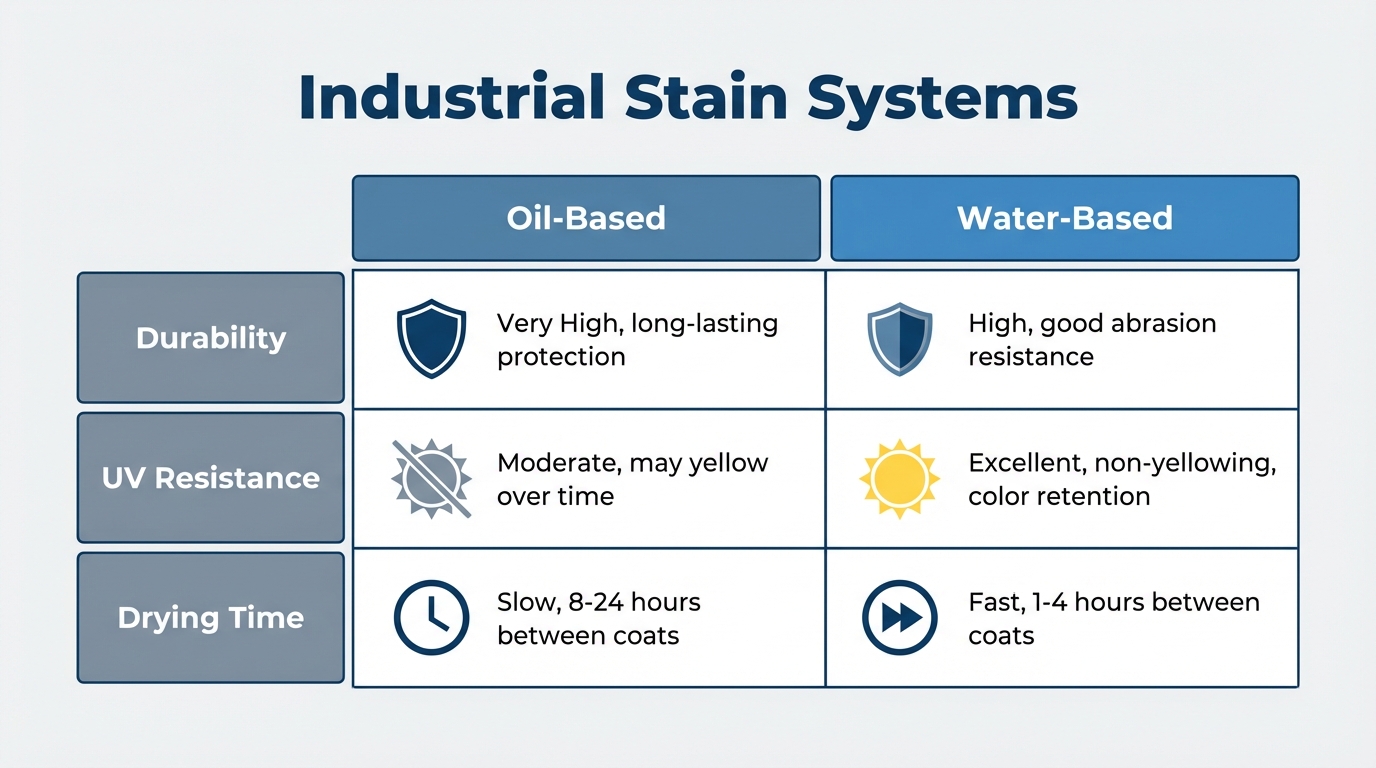
The table below compares the production efficiency of water-based versus oil-based systems.
| Metric | Water-Based System | Oil-Based System |
|---|---|---|
| Drying Time (Between Coats) | 1 – 2 Hours | 12 – 24 Hours |
| VOC Emissions | Very Low (Eco-friendly) | High (Requires ventilation) |
| UV Stability | Excellent (Non-yellowing) | Moderate (Natural darkening) |
Key Takeaway: Water-based systems are the future of high-efficiency, eco-conscious furniture manufacturing, providing fast turnaround times without compromising on UV protection.
Believe it or not.
VI. Surface Preparation Steps That Affect Final Color
High-quality surface preparation is the secret weapon for anyone learning how to stain outdoor wood furniture with professional, uniform results. Without a perfectly sanded surface, pigments will collect in sanding scratches or be rejected by “glazed” wood fibers, leading to a blotchy and amateur appearance. Our industrial sanding protocols involve a multi-stage process using calibrated wide-belt sanders to ensure that every square inch of the wood is ready for the coating line.
The Progression of Grits
We utilize a strict progression of abrasive grits, typically starting at 80-grit to remove milling marks and finishing at 150-grit or 180-grit for the final staining surface. Sanding too fine (above 220-grit) can actually “burnish” the wood, closing the pores and preventing the stain from penetrating, which is one of the most common quality issues in wooden furniture manufacturing .
Our sanding checklist includes:
- Verification of abrasive belt sharpness to prevent wood burning.
- Automated dust extraction to ensure a clean surface for stain adhesion.
- Manual inspection of all joints and carved areas for cross-grain scratches.
It gets better.
Tack-Cloth Cleaning and Dust Management
Even the smallest amount of residual sawdust can act as a barrier to the stain, creating “fish-eyes” or bumps in the final finish. Every component is subjected to a high-pressure air blast followed by a manual tack-cloth wipe-down immediately before it enters the spray booth.
The table below outlines the industrial sanding stages for outdoor furniture.
| Sanding Stage | Grit Level | Purpose |
|---|---|---|
| Rough Sanding | 80 – 100 | Remove planer marks and level the surface |
| Intermediate Sanding | 120 – 150 | Remove scratches from the rough stage |
| Finish Sanding | 180 | Open pores for optimal stain penetration |
Key Takeaway: Industrial-grade surface preparation is the most labor-intensive but critical phase for ensuring a flawless, high-value finish on outdoor furniture.
Let that sink in.
VII. How to Maintain Color Consistency in Outdoor Furniture Production
Maintaining color consistency is the hardest part of mastering how to stain outdoor wood furniture when dealing with thousands of units in a single order. Because wood is a natural material with inherent color variations, the factory must use “control samples” and spectrophotometers to ensure that every chair in a dining set matches the table perfectly. Failure to manage this leads to “checkerboard” effects in retail showrooms, which is a major red flag for B2B buyers.
Using Spectrophotometers for Digital Matching
We utilize advanced digital spectrophotometers to measure the “LAB” color values of our finishes in real-time on the production line. This allows us to make micro-adjustments to the stain mixture if we notice the color drifting due to changes in wood density or ambient humidity. Utilizing a furniture quality inspection checklist for bulk orders ensures that these digital checks are performed at the start, middle, and end of every shift.
The Master Sample Protocol
Every production run is compared against a “Master Sample” that has been signed off by the client and stored in a light-controlled environment to prevent fading. This physical sample serves as the ultimate arbiter of color accuracy, ensuring that re-orders from different years still match the original product line.
We focus on these consistency checks:
- Daily verification of stain batch numbers and mix ratios.
- Lighting booths that simulate “Store Light,” “Daylight,” and “Home Light.”
- Side-by-side comparison of random components from different pallets.
Think about it.
Managing Natural Wood Variation
Since wood is organic, we group timber by its natural base color before it ever reaches the staining line. This “pre-sorting” ensures that light wood receives more pigment and dark wood receives less, resulting in a harmonized final appearance.
The table below summarizes the tools used to maintain color consistency.
| Tool / Method | Technical Function | Benefit to Buyer |
|---|---|---|
| Spectrophotometer | Measures light wavelengths for color | Eliminates human error in color matching |
| Master Control Samples | Physical reference for visual checks | Guarantees consistency across multiple orders |
| Pre-Sorting Timber | Groups wood by natural base tone | Prevents extreme color variances in sets |
Key Takeaway: Color consistency in mass production requires a combination of high-tech digital measurement and traditional wood-sorting expertise.
Now we are getting somewhere.
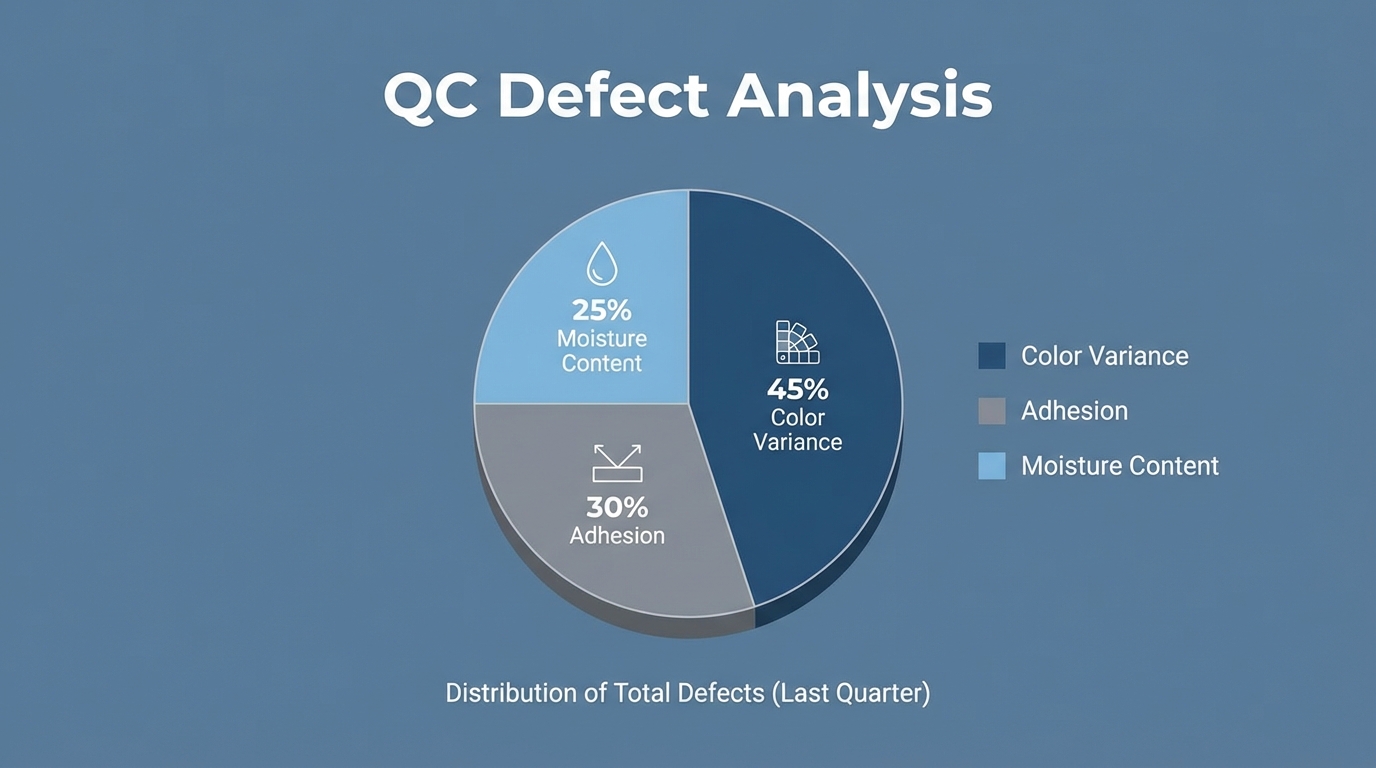
VIII. Quality Control Checks to Prevent Staining Defects
Implementing strict quality control checkpoints is the only way to guarantee how to stain outdoor wood furniture without falling victim to common manufacturing defects. From “runs” and “sags” in the finish to “ghosting” where the stain didn’t penetrate, every potential error must be caught before the furniture reaches the packing department. Our QC team operates as an independent body within the factory, empowered to stop the line if quality standards are not being met.
Adhesion and Cross-Hatch Testing
To ensure the stain won’t peel under the stress of outdoor weather, we perform regular “cross-hatch” adhesion tests on production samples. This involves cutting a grid into the finish and applying a standardized tape to see if any of the coating can be pulled away from the wood surface. For more details on our products, visit our outdoor furniture category page.
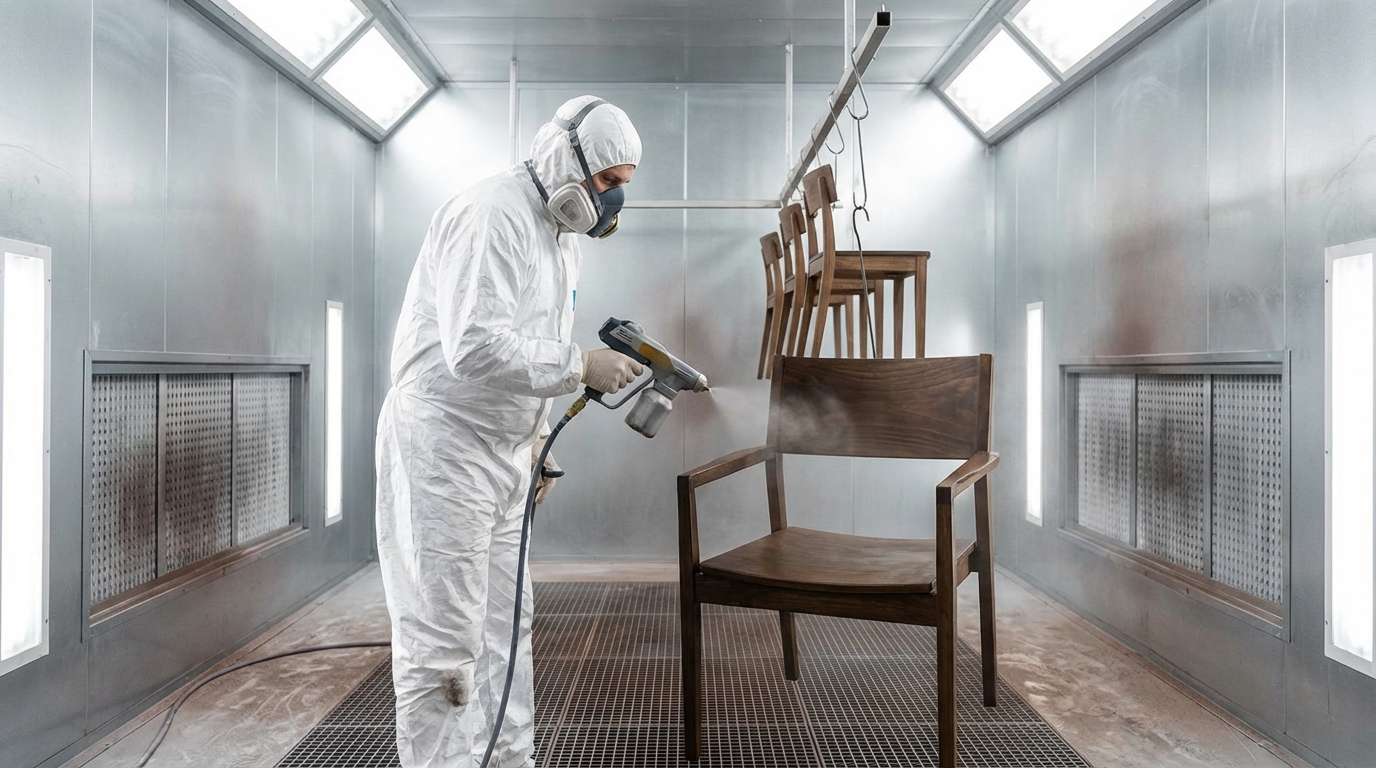
Monitoring Environmental Conditions
The environment inside the spray booth must be strictly controlled, as high humidity can prevent stains from drying, and low temperatures can cause the finish to become cloudy. We track these metrics every hour to ensure they stay within the “Goldilocks Zone” for the specific stain chemistry being used.
Our QC inspectors check for:
- Uniformity of color across all surfaces, including underside and joints.
- Absence of “orange peel” texture or dust inclusions in the topcoat.
- Proper sealing of all end-grain and hardware-drilled holes.
You won’t believe this.
Real-Time Defect Analysis
By categorizing every defect found during inspection, we can identify root causes—such as a clogged spray nozzle or an improperly sanded batch—and fix them immediately. This proactive approach reduces waste and ensures that only 100% compliant furniture is shipped to our clients.
The table below highlights common staining defects and their industrial solutions.
| Common Defect | Outcome A (Root Cause) | Outcome B (Industrial Solution) |
|---|---|---|
| Blotching | Uneven absorption in soft wood | Apply pre-stain conditioner/wash coat |
| Sags / Runs | Excessive stain application | Adjust spray pressure and nozzle speed |
| Peeling | High wood moisture or poor sanding | Enforce 8-12% MC and grit progression |
Key Takeaway: A multi-layered quality control system is the only defense against the myriad of defects that can occur during the industrial staining process.
It’s a game changer.
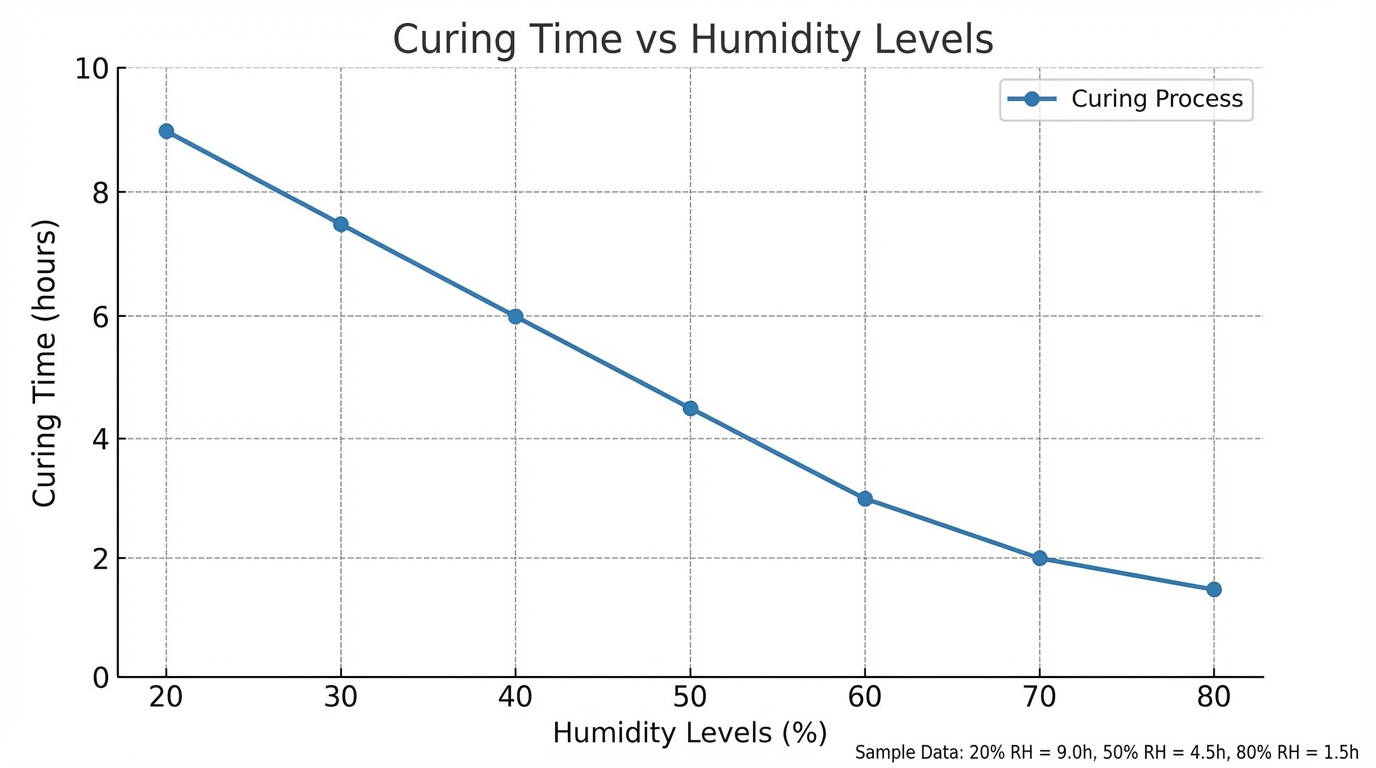
IX. Proper Curing and Drying for Long-Lasting Finish
The curing and drying environment is the final technical hurdle in mastering how to stain outdoor wood furniture that can withstand years of exposure. “Drying” is simply the evaporation of solvents, but “curing” is a chemical reaction that hardens the finish into a protective shield. In an industrial setting, we use climate-controlled tunnels to ensure this process happens evenly and completely before the furniture is handled or packed.
Controlled Evaporation and Temperature
If a stain dries too quickly on the surface, it can trap solvents underneath, leading to a “soft” finish that is easily damaged during transit. We use a graduated temperature approach in our drying tunnels, slowly increasing the heat to allow solvents to escape from the deep wood fibers before the surface skin hardens.
Key curing parameters include:
- Maintaining a relative humidity of 45-55% in the drying area.
- Using infrared (IR) or ultraviolet (UV) lamps for specialized coatings.
- Ensuring adequate airflow to remove evaporated solvent vapors.
This is the secret sauce.
Assessing Finish Hardness (The Pencil Test)
Our lab technicians perform “Pencil Hardness” tests on cured samples to verify that the finish has reached its maximum durability rating. This ensures that the outdoor furniture can resist the scratches and abrasions that occur during daily use in a garden or patio setting.
The table below summarizes the curing requirements for different stain types.
| Coating Type | Curing Mechanism | Optimal Temperature |
|---|---|---|
| Oil-Based | Oxidation | 20°C – 25°C |
| Water-Based | Coalescence/Evaporation | 25°C – 35°C |
| UV-Cured | Chemical Photo-reaction | Instant (via UV lamps) |
Key Takeaway: Precision in the curing phase is what separates a finish that looks good today from one that lasts for decades in the sun and rain.
Wait, there’s even more.
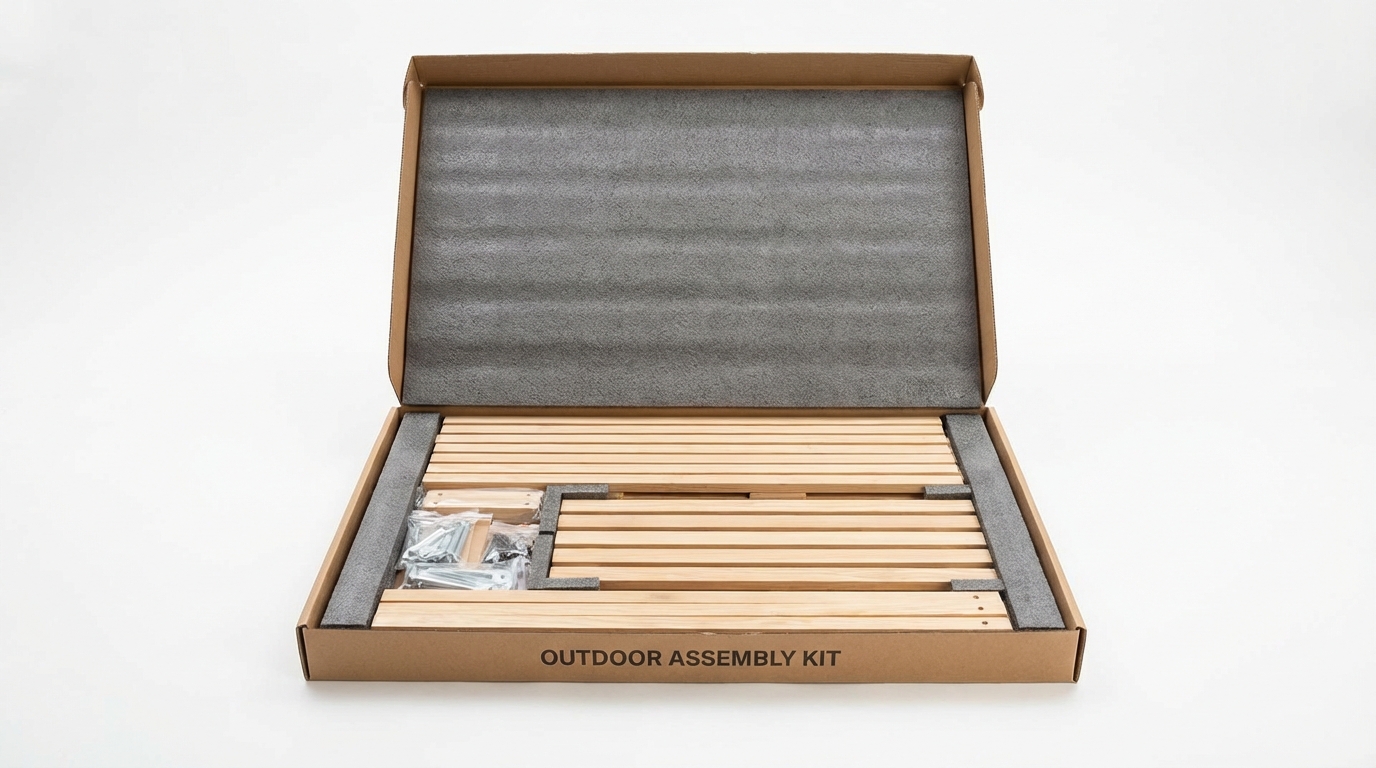
X. Final Inspection and Packaging to Protect the Stain
The final step in how to stain outdoor wood furniture involves protecting that pristine finish during the thousands of miles it will travel in a shipping container. Even the best stain job can be ruined by “packing marks” or “blanket rub” if the furniture is wrapped before it is fully cured or if the wrong materials are used. Our packaging department uses specialized soft-foam inserts and moisture-absorbing silica packets to ensure the furniture arrives in showroom condition.
Preventing Chemical Reactions in the Box
Certain plastic wraps can chemically react with wood stains if the temperature inside a shipping container exceeds 50°C, causing the wrap to “melt” into the finish. We use pH-neutral paper and non-reactive PE foam to create a barrier between the wood and the outer corrugated cardboard box.
Our packaging standards include:
- ISTA-standard drop tests to ensure the box can withstand rough handling.
- Double-walled corrugated cardboard for all export-grade shipments.
- Corner protectors to prevent impact damage to the most vulnerable parts.
The bottom line is this.
Managing Container Humidity
High-seas transport involves extreme humidity fluctuations that can cause wood to expand or “sweat,” potentially damaging a fresh stain. We utilize high-capacity desiccant bags inside every container to maintain a stable environment and prevent mold or finish degradation.
The table below outlines our protective packaging layers.
| Layer | Material | Primary Function |
|---|---|---|
| Primary Wrap | pH-Neutral Paper | Prevents surface scratches and chemical bonding |
| Cushioning | PE Foam / Bubble Wrap | Absorbs shocks and prevents impact damage |
| External | Double-Walled Cardboard | Structural integrity for stacking in containers |
Key Takeaway: Packaging is not just about protection from breaks; it is a critical final stage in preserving the chemical integrity of the wood stain.
Now you know.
FAQ
Can I stain over an existing finish on outdoor furniture?
In an industrial or B2B context, we strongly advise against staining over old finishes because it compromises adhesion and color depth. To achieve a factory-grade result, the old finish must be completely stripped or sanded down to the raw wood to ensure the new pigments can penetrate the fibers.
What’s the best stain for high-humidity tropical environments?
For tropical regions, we recommend an oil-based system with high concentrations of fungicides and trans-oxide pigments. Oil-based stains offer superior water-shedding capabilities and prevent the wood from absorbing the excessive ambient moisture that leads to rot and structural failure.
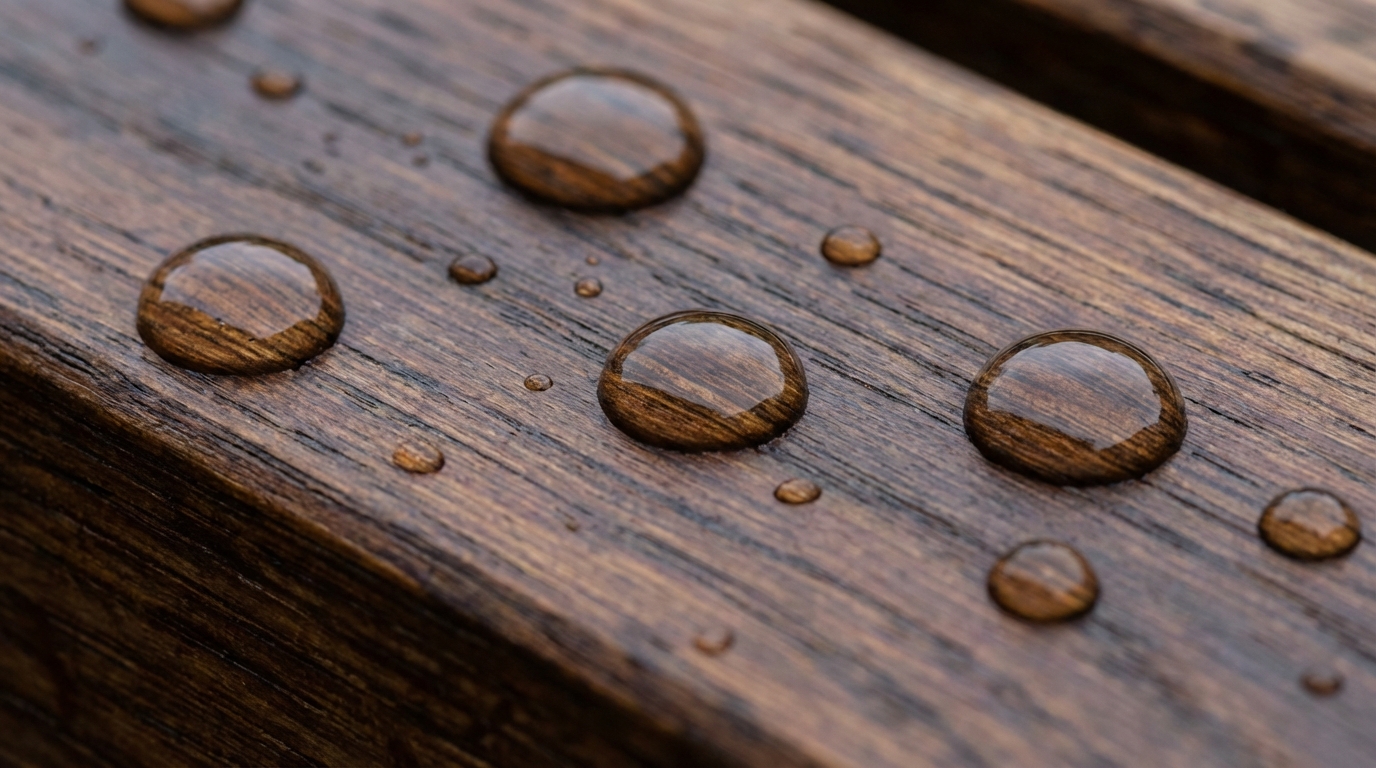
How do I know if the wood is dry enough to stain?
You should always use a calibrated digital moisture meter to verify that the timber is between 8% and 12% moisture content. If you do not have a meter, the “water drop test” can provide a rough estimate; if water beads on the surface, the wood is too wet or sealed to accept stain.
Successfully mastering how to stain outdoor wood furniture at scale requires technical precision, from managing 8-12% moisture levels to selecting the right industrial coating systems. If you’re looking for a reliable manufacturing partner to handle your next bulk order, feel free to contact us for expert guidance and high-quality production services.