
Many property managers and homeowners struggle with peeling finishes and greying timber just months after an expensive restoration, leading to wasted labor and diminished curb appeal. This repetitive cycle of failure stems from a lack of technical understanding regarding wood cell degradation and coating adhesion.
To successfully refinish outdoor wood furniture, you must prioritize deep chemical cleaning, sequential mechanical sanding to a maximum of 120-grit, and the application of high-pigment penetrating oils rather than film-forming varnishes. This methodology ensures maximum UV protection and moisture regulation while facilitating easy future maintenance.
I. Why Your Previous Outdoor Wood Furniture Finishes Failed
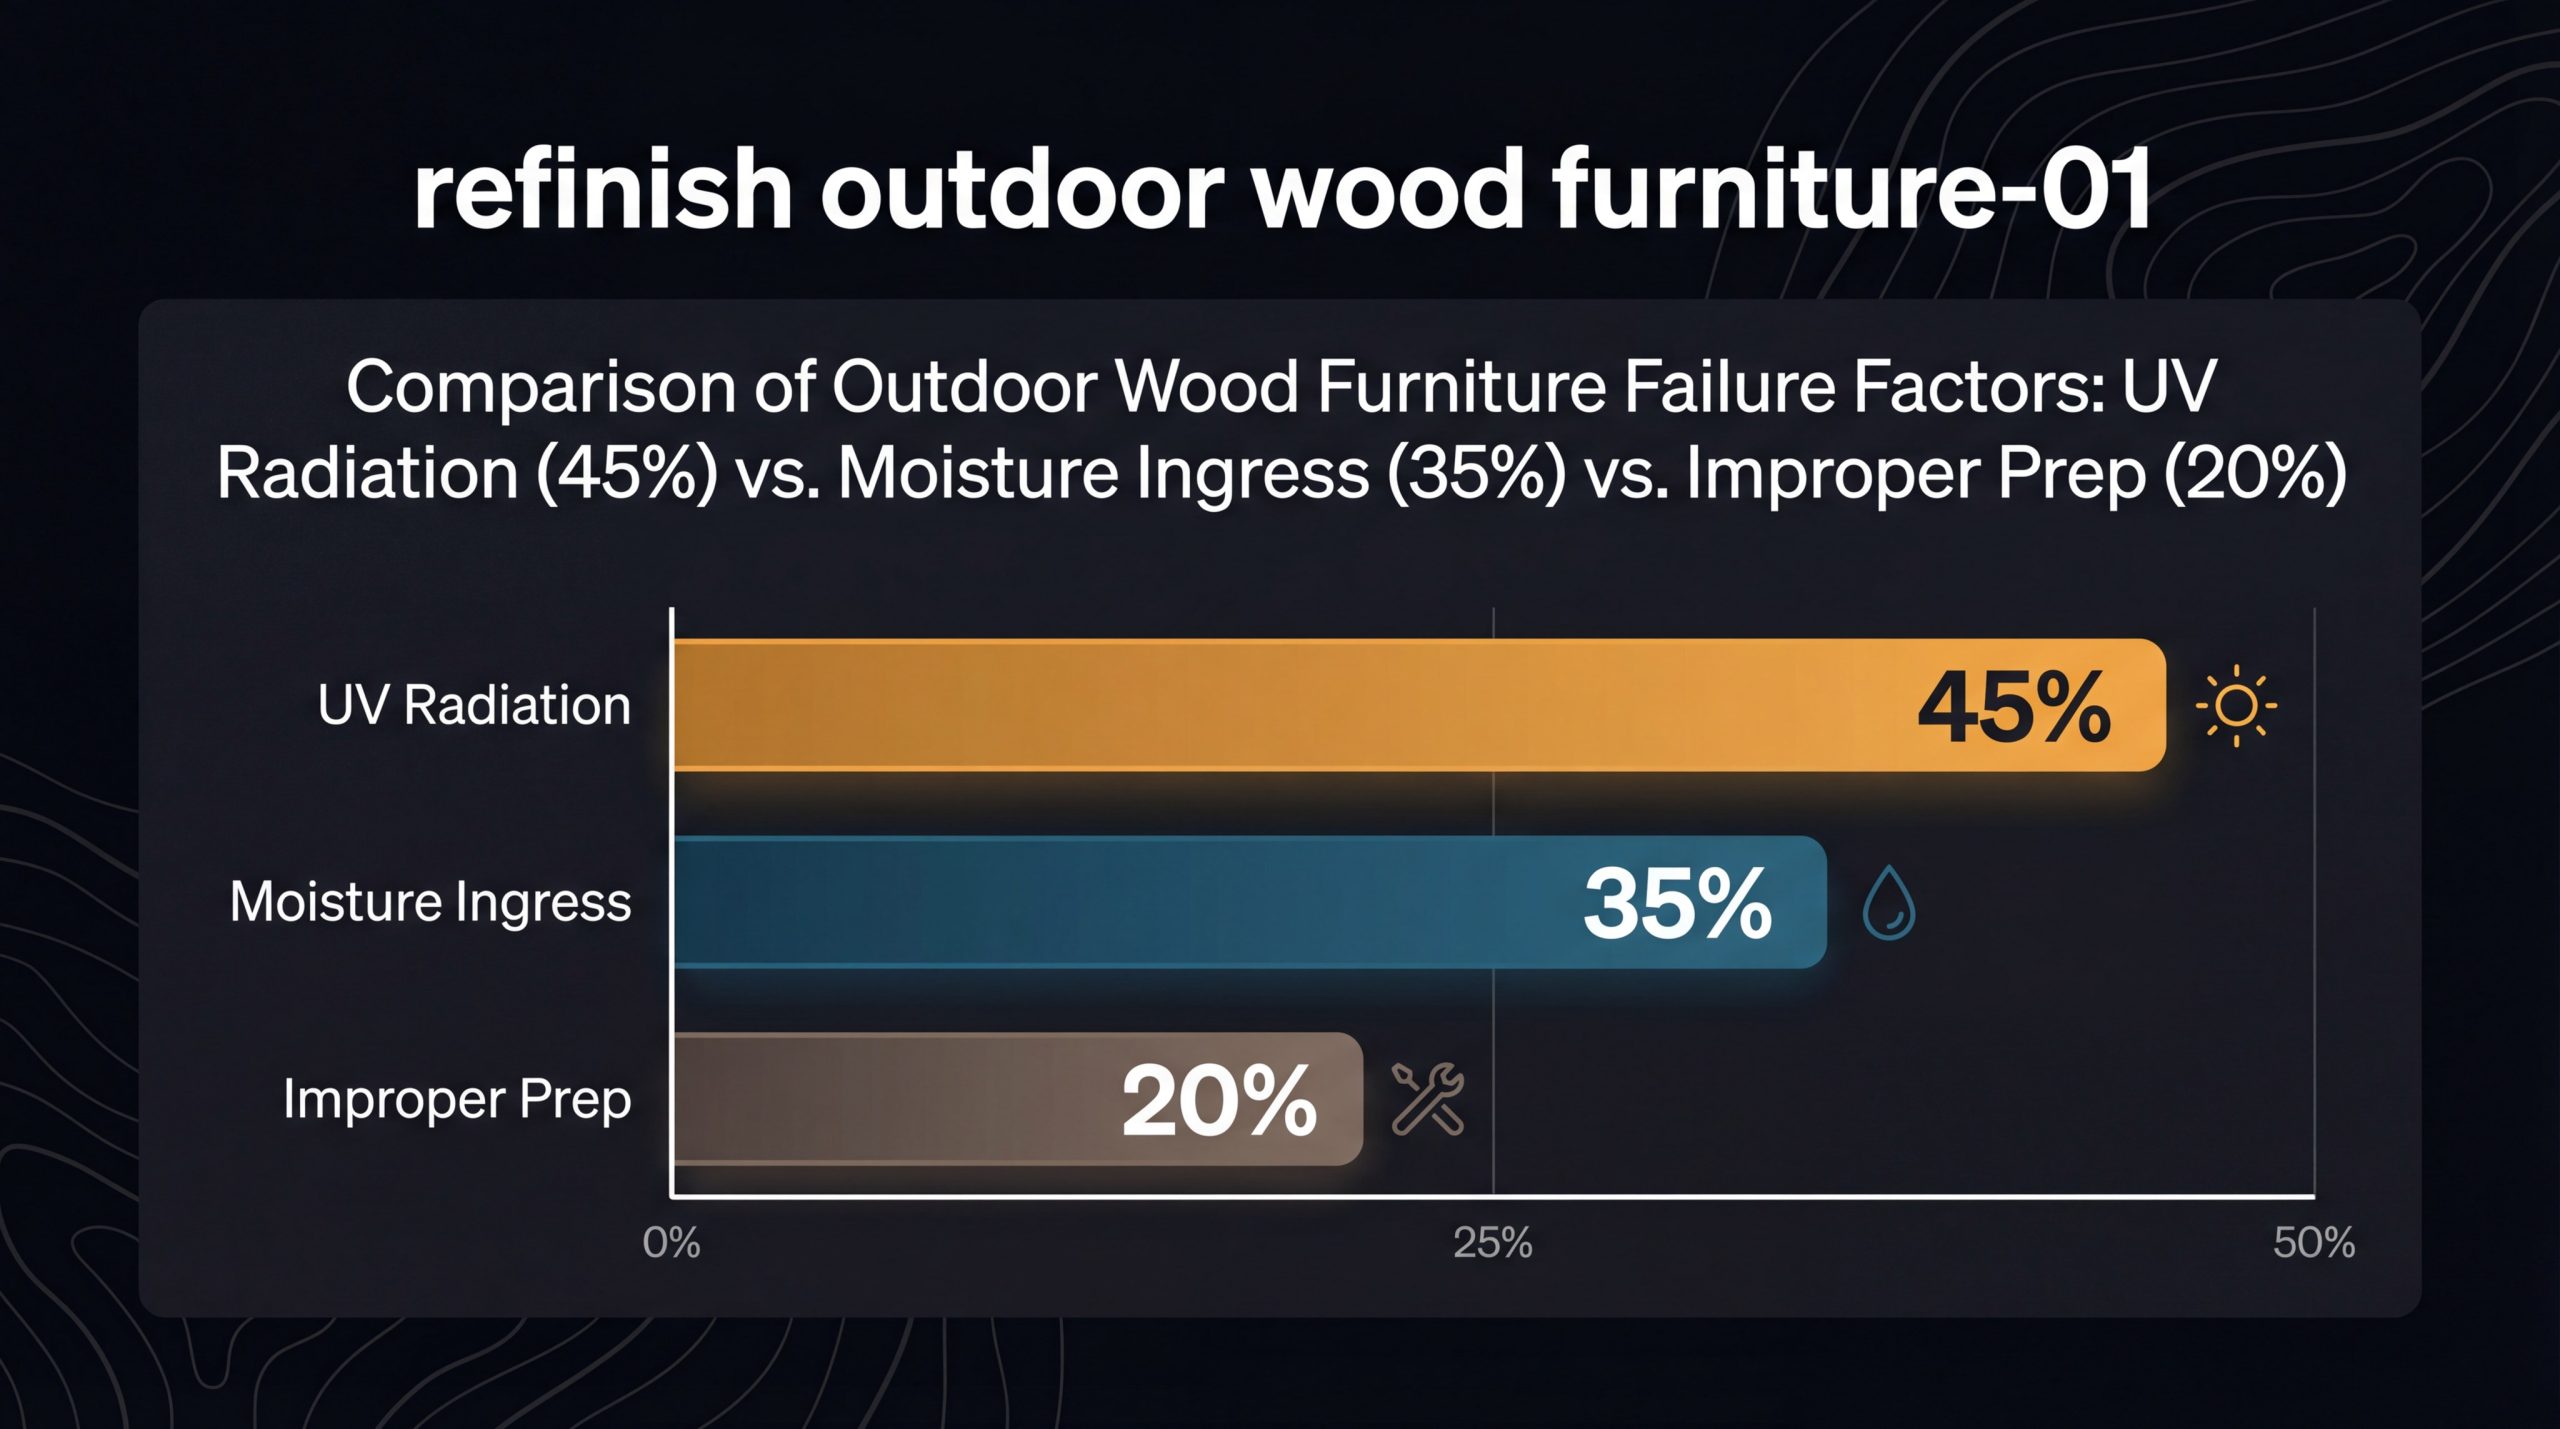
The most common reason your outdoor wood furniture failed in the past is the destructive combination of solar radiation and moisture ingress. Ultraviolet rays break down the lignin that holds wood fibers together, causing a microscopic layer of “dead” wood that prevents any new stain from bonding effectively to the surface. When you apply a thick, film-forming coating over these compromised fibers, the natural expansion and contraction of the timber inevitably causes the finish to crack and peel within a single season.
Moisture Versus UV Damage Dynamics
You must recognize that moisture trapped beneath a non-breathable finish is just as dangerous as the scorching sun because it creates high hydrostatic pressure that pushes the coating off the wood. While UV rays bleach the natural pigments and weaken the structural integrity of the surface cells, internal moisture promotes the growth of fungal spores that lead to deep-seated rot. Understanding this dual threat is the first step toward selecting a refinishing system that balances breathability with robust protective barriers.
The Role of Poor Surface Preparation
Many failures occur because the technician skips the critical step of removing the “mill glaze” or the weathered grey layer that acts as a physical shield against stain penetration. If you do not mechanically or chemically expose the fresh, thirsty wood cells, your chosen product will simply sit on top of the debris rather than integrating with the cellular structure. This lack of deep integration means the finish lacks the mechanical grip required to withstand the harsh environmental fluctuations typical of outdoor exposure.
Identifying Incompatible Chemical Layers
Applying modern water-based sealants directly over old, oily residues is a guaranteed recipe for immediate delamination and a blotchy, unprofessional appearance. You must ensure that every trace of previous waxes, silicones, or incompatible oils is completely neutralized or stripped away before introducing a new finishing chemistry. Failing to verify chemical compatibility often results in a tacky surface that refuses to cure, attracting dust and pollen that permanently ruin the aesthetic of the piece.
- Conduct a “splash test” to check for existing sealants.
- Use a chemical stripper to remove stubborn film-forming paints.
- Always neutralize caustic cleaners with a mild acidic brightener.
To help you diagnose why your previous projects did not last, consider the technical corrections required for each symptom.
| Symptom | Primary Root Cause | Technical Correction |
|---|---|---|
| Peeling/Flaking | Poor Adhesion/Moisture Trapped | Deep strip and moisture meter check |
| Greying under finish | UV degradation of wood cells | Increase pigment load in stain |
| Sticky/Tacky surface | Over-application or wrong temp | Chemical wipe-down and thinner |
Does this make sense?
It is time to look at the bigger picture.
Key Takeaway: Understanding that UV-driven lignin breakdown and trapped moisture are the primary drivers of finish failure allows you to move beyond superficial fixes toward a scientifically sound restoration.
II. Decision Matrix: Refinish or Repaint Outdoor Wood Furniture?
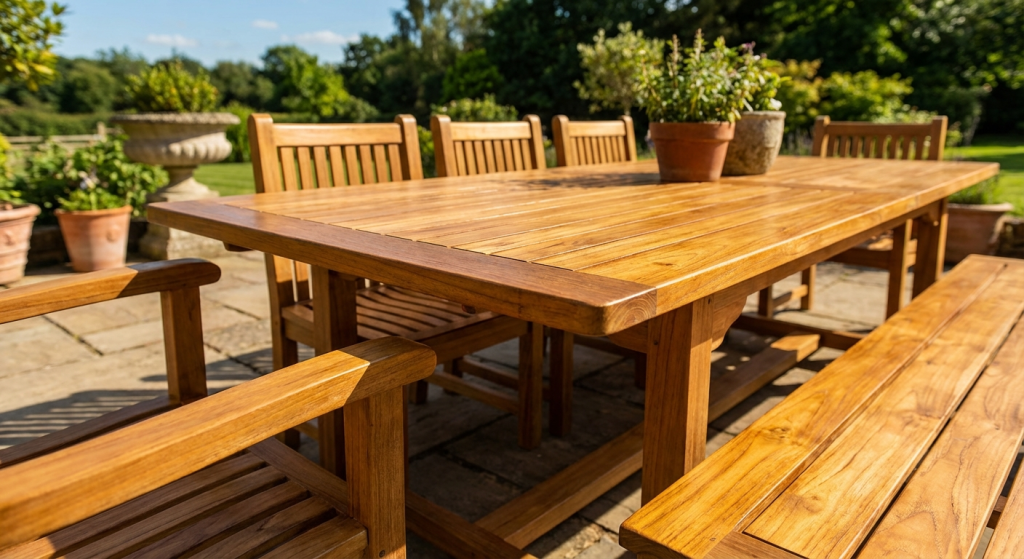
Before you invest hours into a restoration, you must decide if your outdoor wood furniture is a candidate for a transparent stain or if a solid paint is necessary to hide structural imperfections. Professional suppliers often recommend evaluating the timber’s density and current state of decay, as high-value woods like teak or acacia deserve to be showcased rather than smothered. Making the wrong choice here can result in an aesthetic mismatch that fails to respect the natural beauty of the material or provide the level of protection required for its specific environment.
Assessing the Wood for Structural Integrity
You need to perform a “probe test” by pressing a small screwdriver into hidden areas of the frame to check for soft spots that indicate advanced fungal rot. If the wood is structurally sound but merely weathered on the surface, a transparent refinishing process will restore its original luster and highlight the intricate grain patterns. However, if the timber is severely checked or has multiple mismatched replacement parts, a high-quality solid-color stain or exterior paint may be the most cost-effective way to achieve a uniform look.
Balancing Aesthetic Value and Maintenance
Preserving the natural silver patina of aged cedar might be desirable for some, but for most B2B applications, a rich, warm wood tone provides a more premium and inviting atmosphere. Refinishing with oils requires a more frequent maintenance schedule than painting, yet it avoids the catastrophic peeling that makes repainting such a labor-intensive nightmare in the long run. You must weigh the immediate visual impact of a natural finish against the long-term operational costs of the maintenance cycles associated with each choice.
Durability Trade-offs of Different Coatings
When you choose a solid coating, you are essentially creating a plastic-like shield that offers superior UV protection but can trap moisture if the wood is not perfectly dry before application. Conversely, penetrating stains allow the wood to breathe and are much easier to “refresh” with a simple cleaning and recoat without the need for aggressive sanding.
- Refinish for premium hardwoods like Teak, Ipe, or Acacia.
- Repaint for budget softwoods or pieces with significant surface damage.
- Consider semi-transparent stains as a middle-ground for moderate protection.
The following comparison matrix helps you select the best path forward based on your specific project goals.
| Factor | Refinishing (Stain/Oil) | Repainting (Solid Coating) |
|---|---|---|
| Visual Appeal | Enhances natural wood grain | Hides imperfections/mismatched wood |
| Ease of Repair | Simple “clean and recoat” | Requires full sanding when it fails |
| Durability | Low to Moderate (Requires annual care) | High (Protects against heavy UV) |
But wait, there’s more.
Preparation starts with the right removal strategy.
Key Takeaway: Choosing between refinishing and repainting depends on the structural condition of the timber and your willingness to commit to either frequent light maintenance or infrequent heavy restoration.
III. Selecting Stripping Methods for Outdoor Wood Furniture
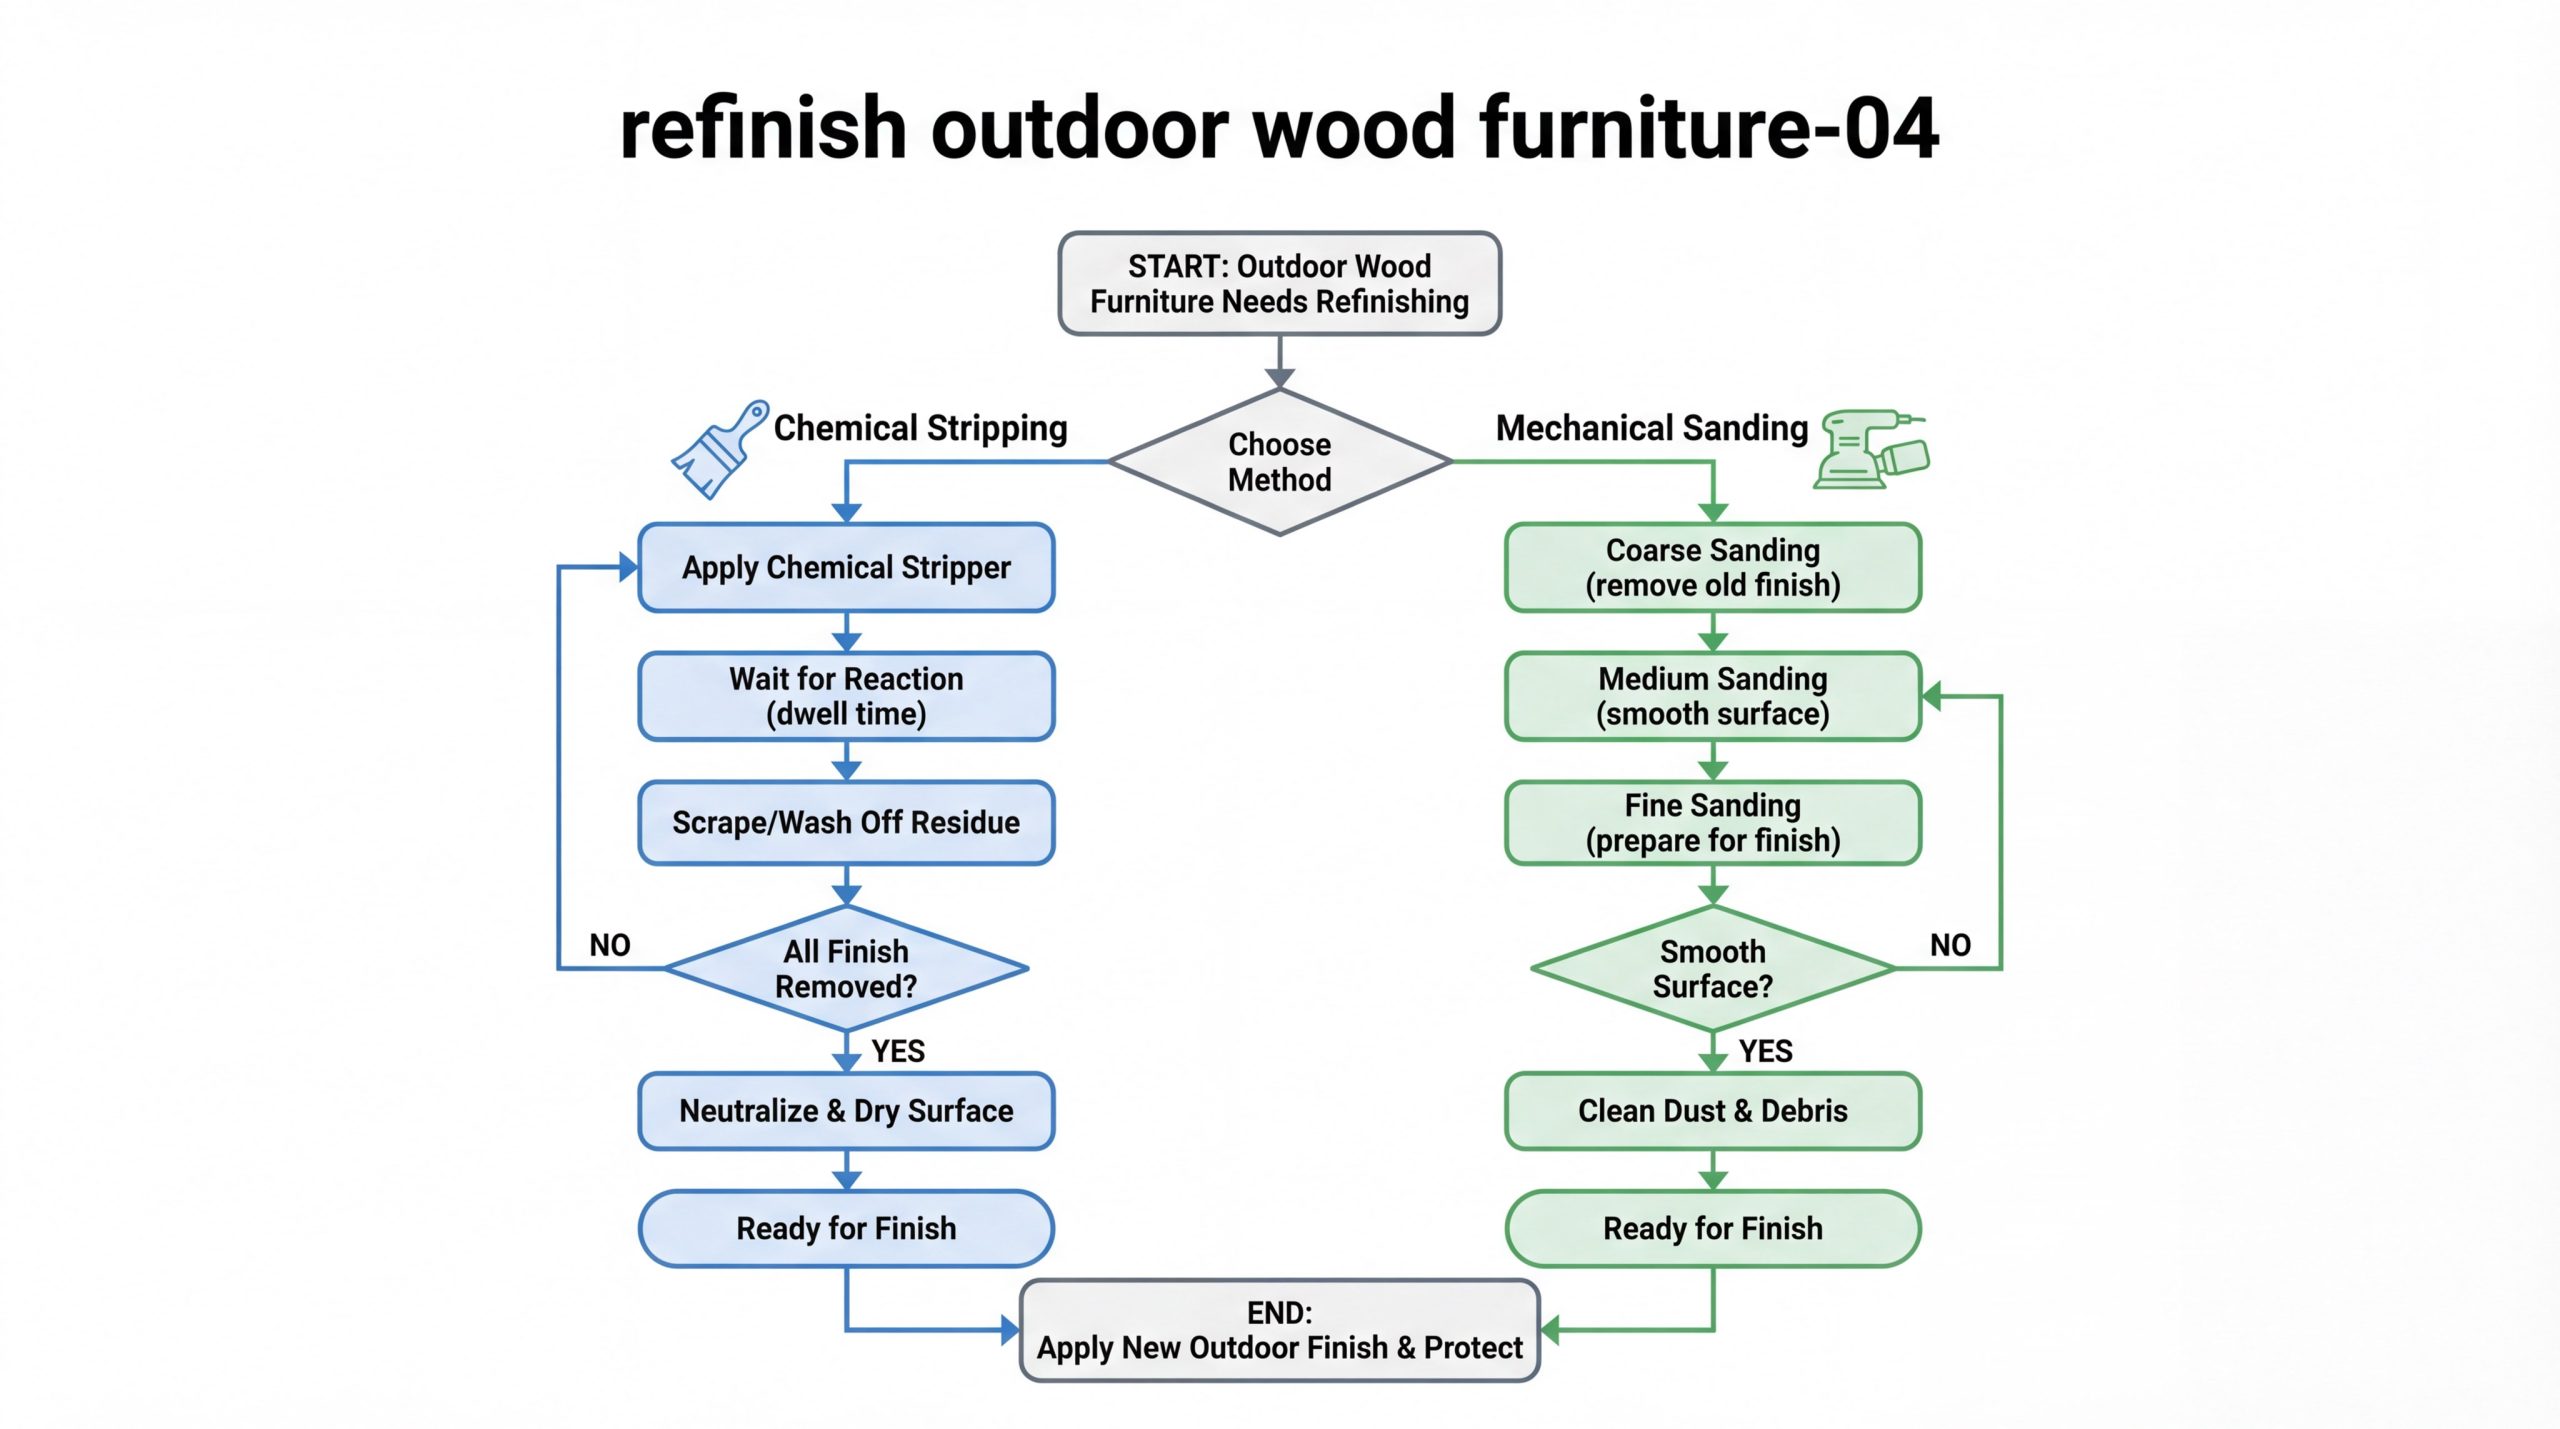
Removing the old, degraded layers from your outdoor wood furniture requires a strategic choice between chemical strippers and mechanical sanding based on the furniture’s geometry. For large, flat surfaces like tabletops, mechanical sanding is often the fastest route, but intricate lattice-work and carved legs demand the reach of a high-quality chemical agent. Using the wrong method can either leave behind pockets of old finish that cause blotchiness or result in mechanical damage to the delicate wood fibers.
Chemical Versus Mechanical Efficiency
You will find that chemical strippers are indispensable for removing multiple layers of old paint without thinning the wood or rounding off sharp architectural edges. While sanding creates significant amounts of fine dust that can be hazardous, chemicals work by breaking the molecular bond of the finish, allowing you to scrape it away in a soft, manageable sludge. However, you must be prepared for the extended “dwell time” required for chemicals to work and the subsequent need for thorough rinsing and drying.
Safety Protocols and Lead Detection
Before you begin any aggressive removal, it is vital to test older furniture for lead-based paints, as sanding such pieces can release toxic particles into your workspace and environment. If lead is present, you must use a specialized chemical stripper designed to encapsulate the lead and follow strict containment and disposal regulations. Always wear a respirator, gloves, and eye protection, regardless of the method, to shield yourself from both caustic chemicals and microscopic wood particulates.
Neutralizing the Surface After Stripping
Once the old finish is gone, you cannot simply start staining; the wood’s pH must be restored to a neutral state to ensure the new coating bonds correctly. Many chemical strippers are highly alkaline, which can darken the wood and interfere with the drying process of modern oil-based stains.
- Use a dedicated wood brightener (oxalic acid) to neutralize caustic residues.
- Ensure the wood is thoroughly rinsed with low-pressure water to avoid furring the grain.
- Allow the timber to dry to below 12% moisture content before proceeding.
Compare the efficiency and risk levels of each stripping method below.
| Method | Best Use Case | Risk Level |
|---|---|---|
| Heat Gun | Thick, multi-layered paint | High (Fire risk/scorching) |
| Caustic Strippers | Intricate carvings/details | Moderate (Chemical burns/pH issues) |
| Random Orbit Sanding | Large, flat surfaces | Low (Dust inhalation) |
The process is simple, yet demanding.
Now, let’s look at the actual prep work.
Key Takeaway: Combining mechanical sanding for flats and chemical stripping for details provides the most efficient and thorough removal of old coatings while protecting the wood’s underlying structure.
IV. Essential Preparation for Durable Outdoor Wood Furniture
The ultimate longevity of your outdoor wood furniture restoration is determined almost entirely by the quality of your surface preparation. Even the most expensive, professional-grade stains will fail prematurely if they are applied to wood that is too smooth, too wet, or contaminated with biological growth. You must view preparation as a multi-stage process that opens the wood’s pores and creates a uniform surface profile designed for maximum product absorption.
The Critical Absorbency Splash Test
Before you open a single can of stain, you should perform a splash test by sprinkling water on several areas of the dry wood to see if it beads or soaks in. If the water beads up, it indicates that a previous sealer or mill glaze is still present, and your new finish will not be able to penetrate the fibers. Only when the water absorbs quickly and darkens the wood can you be certain that the timber is “thirsty” enough to accept a protective treatment.
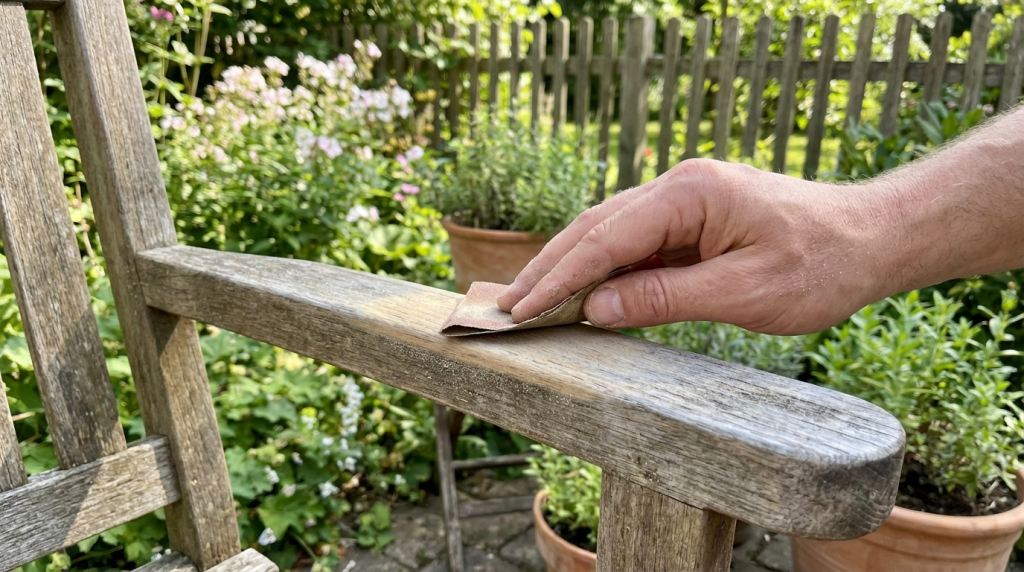
Mastering the Sanding Grit Sequence
You must resist the temptation to sand the wood too finely, as using high-grit papers like 220 or 320 will actually “polish” the wood shut and prevent stain from entering the pores. The professional standard for exterior timber is to start with 60 or 80-grit to remove imperfections and finish with nothing higher than 120-grit for the final pass. This specific sequence ensures the surface is smooth to the touch while maintaining enough “tooth” for the stain to anchor itself deeply within the wood.
Brightening and Cleaning Weathered Fibers
Using a wood brightener containing oxalic acid is the “secret weapon” for removing deep-seated grey tannins and restoring the natural, vibrant color of the timber. This chemical step does more than just improve the look; it lowers the pH of the wood and helps to kill any remaining mold spores that could cause black spots under the new finish.
- Apply a wood cleaner to remove dirt, grease, and biological growth.
- Rinse thoroughly but avoid high-pressure washing which damages wood cells.
- Apply wood brightener and let it sit for 10-15 minutes before a final rinse.
- Check for “furring” of the wood grain and lightly sand if necessary.
Follow this preparation checklist to ensure nothing is missed before the finishing stage.
| Step | Tool/Material | Expected Outcome |
|---|---|---|
| Cleaning | Oxygen Bleach | Removal of mold/mildew spores |
| Brightening | Oxalic Acid | Restores tan/gold color and opens pores |
| Final Sanding | 120-Grit Paper | Uniform surface profile for even staining |
Think you’re ready to stain?
Not until you choose the right product.
Key Takeaway: Meticulous preparation, including absorbency testing and proper sanding grit limits, is the only way to ensure that your outdoor coatings bond permanently rather than sitting superficially on the surface.
V. Choosing Oils, Stains, or Varnishes for Garden Wood
Selecting the correct chemistry for your outdoor wood furniture depends on your climate and how much maintenance you are willing to perform annually. While many people gravitate toward thick, glossy varnishes for their initial beauty, these products often fail spectacularly when exposed to the intense heat and humidity of a garden environment. You must choose between penetrating oils that nourish the wood from within and film-forming stains that provide a robust but potentially brittle exterior shield.
Debunking the Film-Forming Varnish Myth
You should generally avoid using standard interior-grade polyurethanes or thick varnishes on exterior pieces because they cannot cope with the wood’s natural expansion and contraction. Once the sun causes the wood to move, these rigid films develop microscopic cracks that allow water to seep in, leading to the dreaded “cloudy” look and subsequent peeling. For high-performance results, modern water-based hybrid alkyds offer the look of a film but with enough flexibility to move with the timber.
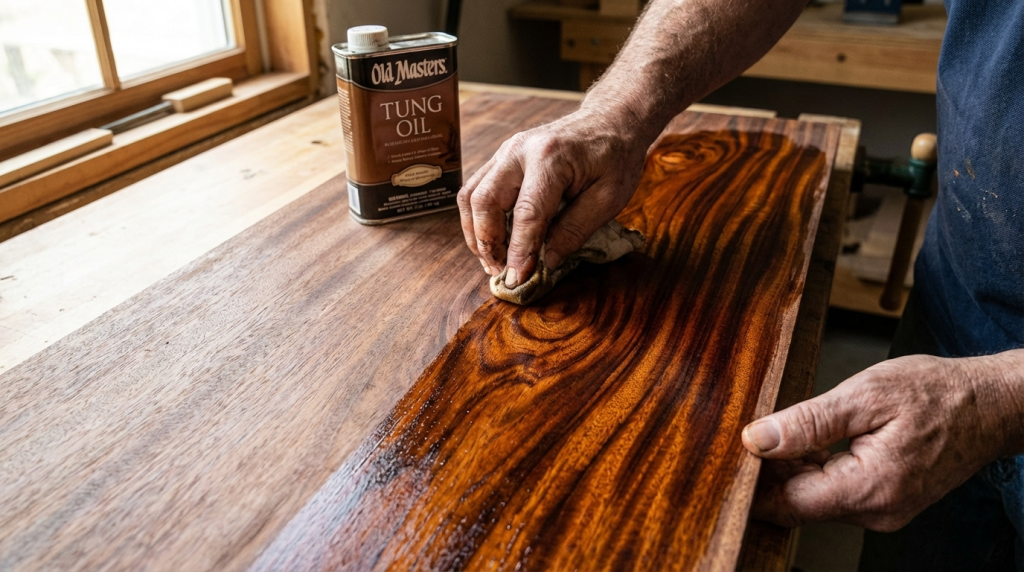
Penetrating Oils for Ease of Maintenance
Penetrating oils, such as those made from tung or linseed, are the preferred choice for many professionals because they never peel; they simply fade over time. When it comes time to refresh the finish, you usually only need a light cleaning and a fresh application of oil, avoiding the need for deep sanding. These products excel at highlighting the natural grain, though they do require more frequent applications—typically every 12 to 18 months—to maintain their protective qualities.
Navigating Opacity and UV Defense
The rule of thumb for UV protection is that more pigment equals more protection, meaning that solid-color stains will always outlast clear sealers in direct sunlight. If you want to see the wood grain but need durability, a semi-transparent stain provides a balanced amount of trans-oxide pigments that act like sunscreen for your furniture.
- Clear Sealers: Best for shaded areas; requires 6-month maintenance.
- Semi-Transparent: The “industry standard” for a balance of look and life.
- Solid Stains: Best for extreme sun or hiding wood defects.
This summary table highlights the performance differences across the major product categories.
| Product Type | UV Protection | Breathability | Life Expectancy |
|---|---|---|---|
| Clear Sealer | Minimal | Excellent | 6-12 Months |
| Semi-Transparent | Moderate | Good | 2-3 Years |
| Solid Stain | Maximum | Poor | 4-6 Years |
It’s all about the right balance.
Application is where the art meets the science.
Key Takeaway: Prioritize penetrating oils or flexible hybrid stains over rigid varnishes to avoid the labor-intensive stripping required when film-forming coatings inevitably fail.
VI. Application Techniques for Outdoor Wood Furniture Sets
Applying the finish to your outdoor wood furniture requires a “wet edge” technique to prevent unsightly lap marks and ensure an even distribution of pigment. Whether you are using a brush, a sprayer, or a rag, you must work in the direction of the grain and complete entire boards at once rather than stopping in the middle. This professional approach ensures that the stain absorbs uniformly, resulting in a deep, consistent color that looks like it came straight from a high-end Shandong factory.
Avoiding Lap Marks and Uneven Coloring
You will encounter lap marks when a section of stain dries before you overlap it with the next stroke, creating a darker, double-pigmented line that is nearly impossible to fix. To avoid this, work in the shade and keep the entire working surface “wet” by moving quickly and using a generous amount of product. If the wood is particularly thirsty, you might need to “back-brush” behind a sprayer to ensure the finish is pushed deep into every pore and crevice.
Delivery Methods: Brush Versus Spray
While HVLP (High Volume Low Pressure) sprayers are incredibly fast for large orders of chairs and tables, a high-quality synthetic brush is often superior for working the product into the wood’s cellular structure. Brushing provides mechanical agitation that breaks the surface tension of the oil, allowing for better penetration than a simple surface-misting from a spray gun. For intricate lattice-work, a combination of spraying for coverage and back-brushing for penetration yields the most durable and professional results.
Managing End-Grain and Joint Absorption
The end-grain of your furniture legs and arms can absorb up to three times as much product as the flat surfaces, acting like a straw that wicks moisture deep into the wood. You must apply multiple coats of finish to these areas until the wood refuses to absorb any more, effectively plugging the “straws” and preventing rot from starting at the bottom.
- Start with the underside and hidden joints to test your color.
- Apply the finish in thin, even coats rather than one heavy layer.
- Always wipe away excess oil that hasn’t absorbed after 15 minutes.
Use the following strategies to optimize the finish for different furniture components.
| Furniture Part | Recommended Tool | Technique |
|---|---|---|
| Slatted Chairs | Natural Bristle Brush | Brush into joints first, then flats |
| Table Tops | HVLP Sprayer | Long, continuous strokes |
| Legs/End Grain | Foam Applicator | “Saturate and soak” method |
Don’t rush the process.
The next step is the most often ignored.
Key Takeaway: Maintaining a wet edge and saturating the end-grain are critical application techniques that prevent aesthetic defects and structural moisture damage.
VII. Proper Drying Times for Outdoor Wood Furniture
Many projects are ruined because the outdoor wood furniture is returned to service or exposed to rain before the finish has fully cured. You must distinguish between “dry to the touch” and “fully cured,” as the latter is a chemical process that can take several days depending on local humidity and temperature. For B2B suppliers, managing this timeline is essential to ensure that products do not arrive with “blocking” issues where the finish sticks to packaging or clothing.
Humidity and Temperature Impact on Curing
You need to monitor the weather forecast closely, as high humidity can double the drying time of oil-based products by preventing the evaporation of solvents. Ideal conditions are typically between 60°F and 80°F with humidity below 50%, providing a stable environment for the resins to harden correctly. If you apply a finish in damp or cold conditions, you risk a tacky surface that will remain soft and vulnerable to damage for weeks.
Managing the Recoat Window
If you wait too long between coats, the first layer may begin to cure and “seal” the wood, preventing the second coat from bonding and leading to a greasy, non-drying mess. Conversely, applying a second coat too soon can trap wet solvents underneath, which will eventually cause the finish to bubble or turn hazy. You must follow the manufacturer’s specific “recoat window,” which usually falls between 4 and 24 hours depending on the product’s chemistry and atmospheric conditions.
Drying Versus Curing: The Key Difference
Drying is simply the evaporation of the liquid carrier, while curing is the chemical cross-linking of the resins that creates the final, hard-wearing protective barrier. Even if a chair feels dry after a few hours, it may still be “off-gassing” and could be permanently dented by heavy cushions or wet through a sudden rainstorm.
- Wait at least 24 hours before light use of the furniture.
- Allow 72 hours for a full cure before placing heavy items or cushions.
- Avoid cleaning the surface with water for the first 30 days.
This table provides a rough estimate of cure times based on your local climate conditions.
| Condition | Time to Recoat | Time to Use |
|---|---|---|
| Hot & Dry (85°F+, <30% Hum) | 2-4 Hours | 24 Hours |
| Temperate (70°F, 50% Hum) | 6-8 Hours | 48 Hours |
| Cool & Damp (55°F, >70% Hum) | 24 Hours | 72+ Hours |
Time is your best friend here.
Now, let’s talk about long-term weatherproofing.
Key Takeaway: Respecting the full curing window and environmental limitations is vital to prevent premature finish failure and ensure the coating reaches its maximum rated durability.
VIII. Weather-Proofing Strategies for Your Patio Pieces

Achieving a truly weather-proof result for your outdoor wood furniture involves more than just a top-coat; it requires a holistic approach to shielding vulnerable areas. High-use pieces in commercial settings benefit from specialized hardware and moisture barriers that prevent the wood from absorbing ground-water through the legs. You must think like a manufacturer to identify the points of failure where water usually gathers and rot begins its slow, destructive journey.
Advanced UV-Shielding Top-Coats
For areas with extreme solar exposure, you might consider applying a sacrificial layer of high-grade carnauba wax or a specialized UV-shielding spray over your cured stain. These products act as a primary defense against the sun’s rays, taking the brunt of the damage so the underlying color and wood fibers remain protected for longer. While this adds a step to your maintenance routine, it can significantly extend the time between major refinishing projects in high-UV climates.
Dealing with Ground-Contact Moisture
You should install plastic or stainless steel glides on the bottom of all furniture legs to lift the wood off the damp ground or wet patio surface. This simple barrier prevents “end-grain wicking,” which is the leading cause of leg rot and structural instability in garden sets. For pieces that sit on grass, consider placing them on small paving stones to ensure that air can circulate underneath the feet, keeping them dry and rot-free.
Sealing Joints and Hardware Connections
Water often enters the wood through screw holes and joinery, so you must ensure that all hardware is tight and that any gaps are sealed with a wood-safe exterior caulk or wax. Using stainless steel or brass hardware is essential to prevent “rust bleeding,” which creates permanent black streaks that can ruin the look of even the best finish.
- Apply a bit of wax to screw threads before reassembling pieces.
- Check that all joinery is tight and apply wood glue to loose mortises.
- Replace corroded steel fasteners with marine-grade stainless steel.
Use these enhancement measures to target the specific vulnerabilities of your outdoor sets.
| Vulnerability | Preventive Measure | Frequency |
|---|---|---|
| Standing Water | Leg caps/Furniture glides | Once (at refinish) |
| Solar Scorching | Pigmented Trans-Oxide Stains | Every 2 years |
| Hardware Corrosion | Stainless Steel Replacement | As needed |
Ready to set it and forget it?
Actually, maintenance is the key to longevity.
Key Takeaway: Implementing moisture barriers at ground-contact points and using UV-shielding enhancements will dramatically increase the service life of your refinishing project.
IX. Maintenance Scheduling for Outdoor Wood Furniture
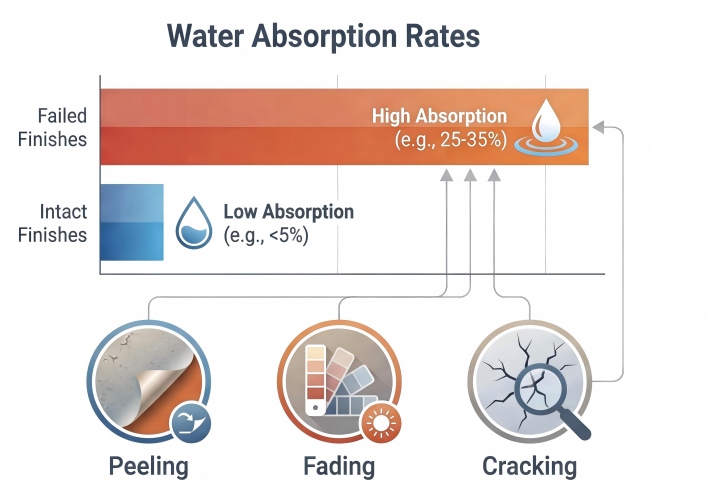
The difference between a 2-year and a 10-year lifespan for your outdoor wood furniture is the consistency of your seasonal maintenance routine. You must learn to recognize the early warning signs of finish failure, such as water no longer beading or the appearance of microscopic surface cracks. By performing light, preventative maintenance, you can avoid the back-breaking labor of a full strip-and-refinish cycle that occurs when you let the furniture go for too long.
Recognizing the Signs of Finish Failure
You should inspect your furniture every spring, looking for “checking”—small cracks in the wood grain—or areas where the color has significantly faded due to UV exposure. If you notice that water is soaking into the wood and leaving dark spots, your protective barrier has been breached and needs immediate attention. Catching these issues early allows you to perform a simple “clean and recoat” rather than a total restoration.
Seasonal Cleaning and Inspection Routines
Using a mild solution of soap and water to remove bird droppings, pollen, and environmental pollutants will prevent these acidic substances from eating through your finish. You must avoid the temptation to use a high-pressure washer for seasonal cleaning, as it can easily strip away the protective oils and fray the delicate wood fibers. A soft brush and a garden hose are all that is required to keep the surface clean and ready for a quick inspection.
The Maintenance Coat Strategy
The most efficient way to maintain a professional finish is to apply a very thin “maintenance coat” of the original product every 18 to 24 months. This process involves a light cleaning, a quick scuff-sanding with 120-grit to remove surface oxidation, and a single wiped-on layer of oil or stain.
- Spring: Deep clean and perform the “splash test” on all surfaces.
- Summer: Spot-treat any areas showing high wear or sun damage.
- Autumn: Store furniture indoors or use breathable, high-quality covers.
This annual calendar will help you stay on top of your furniture’s health throughout the year.
| Season | Action Item | Goal |
|---|---|---|
| Spring | Deep Clean & Splash Test | Verify water repellency |
| Summer | Inspection for UV wear | Spot-treat high-traffic areas |
| Autumn | Storage or Covering | Prevent winter moisture saturation |
It really is that simple.
But what if you need new pieces altogether?
Key Takeaway: Regular seasonal inspections and the proactive application of maintenance coats prevent deep-seated damage and eliminate the need for future aggressive stripping.
X. Sourcing Professional Tools for Wood Projects
Success in refinishing your outdoor wood furniture is often limited by the quality of the tools and materials you have at your disposal. If your current set is beyond repair, sourcing high-quality replacements from a reliable manufacturer can save you years of maintenance headaches. Professional suppliers offer furniture built with controlled moisture levels and factory-applied UV treatments that set a higher baseline for durability than most retail options.
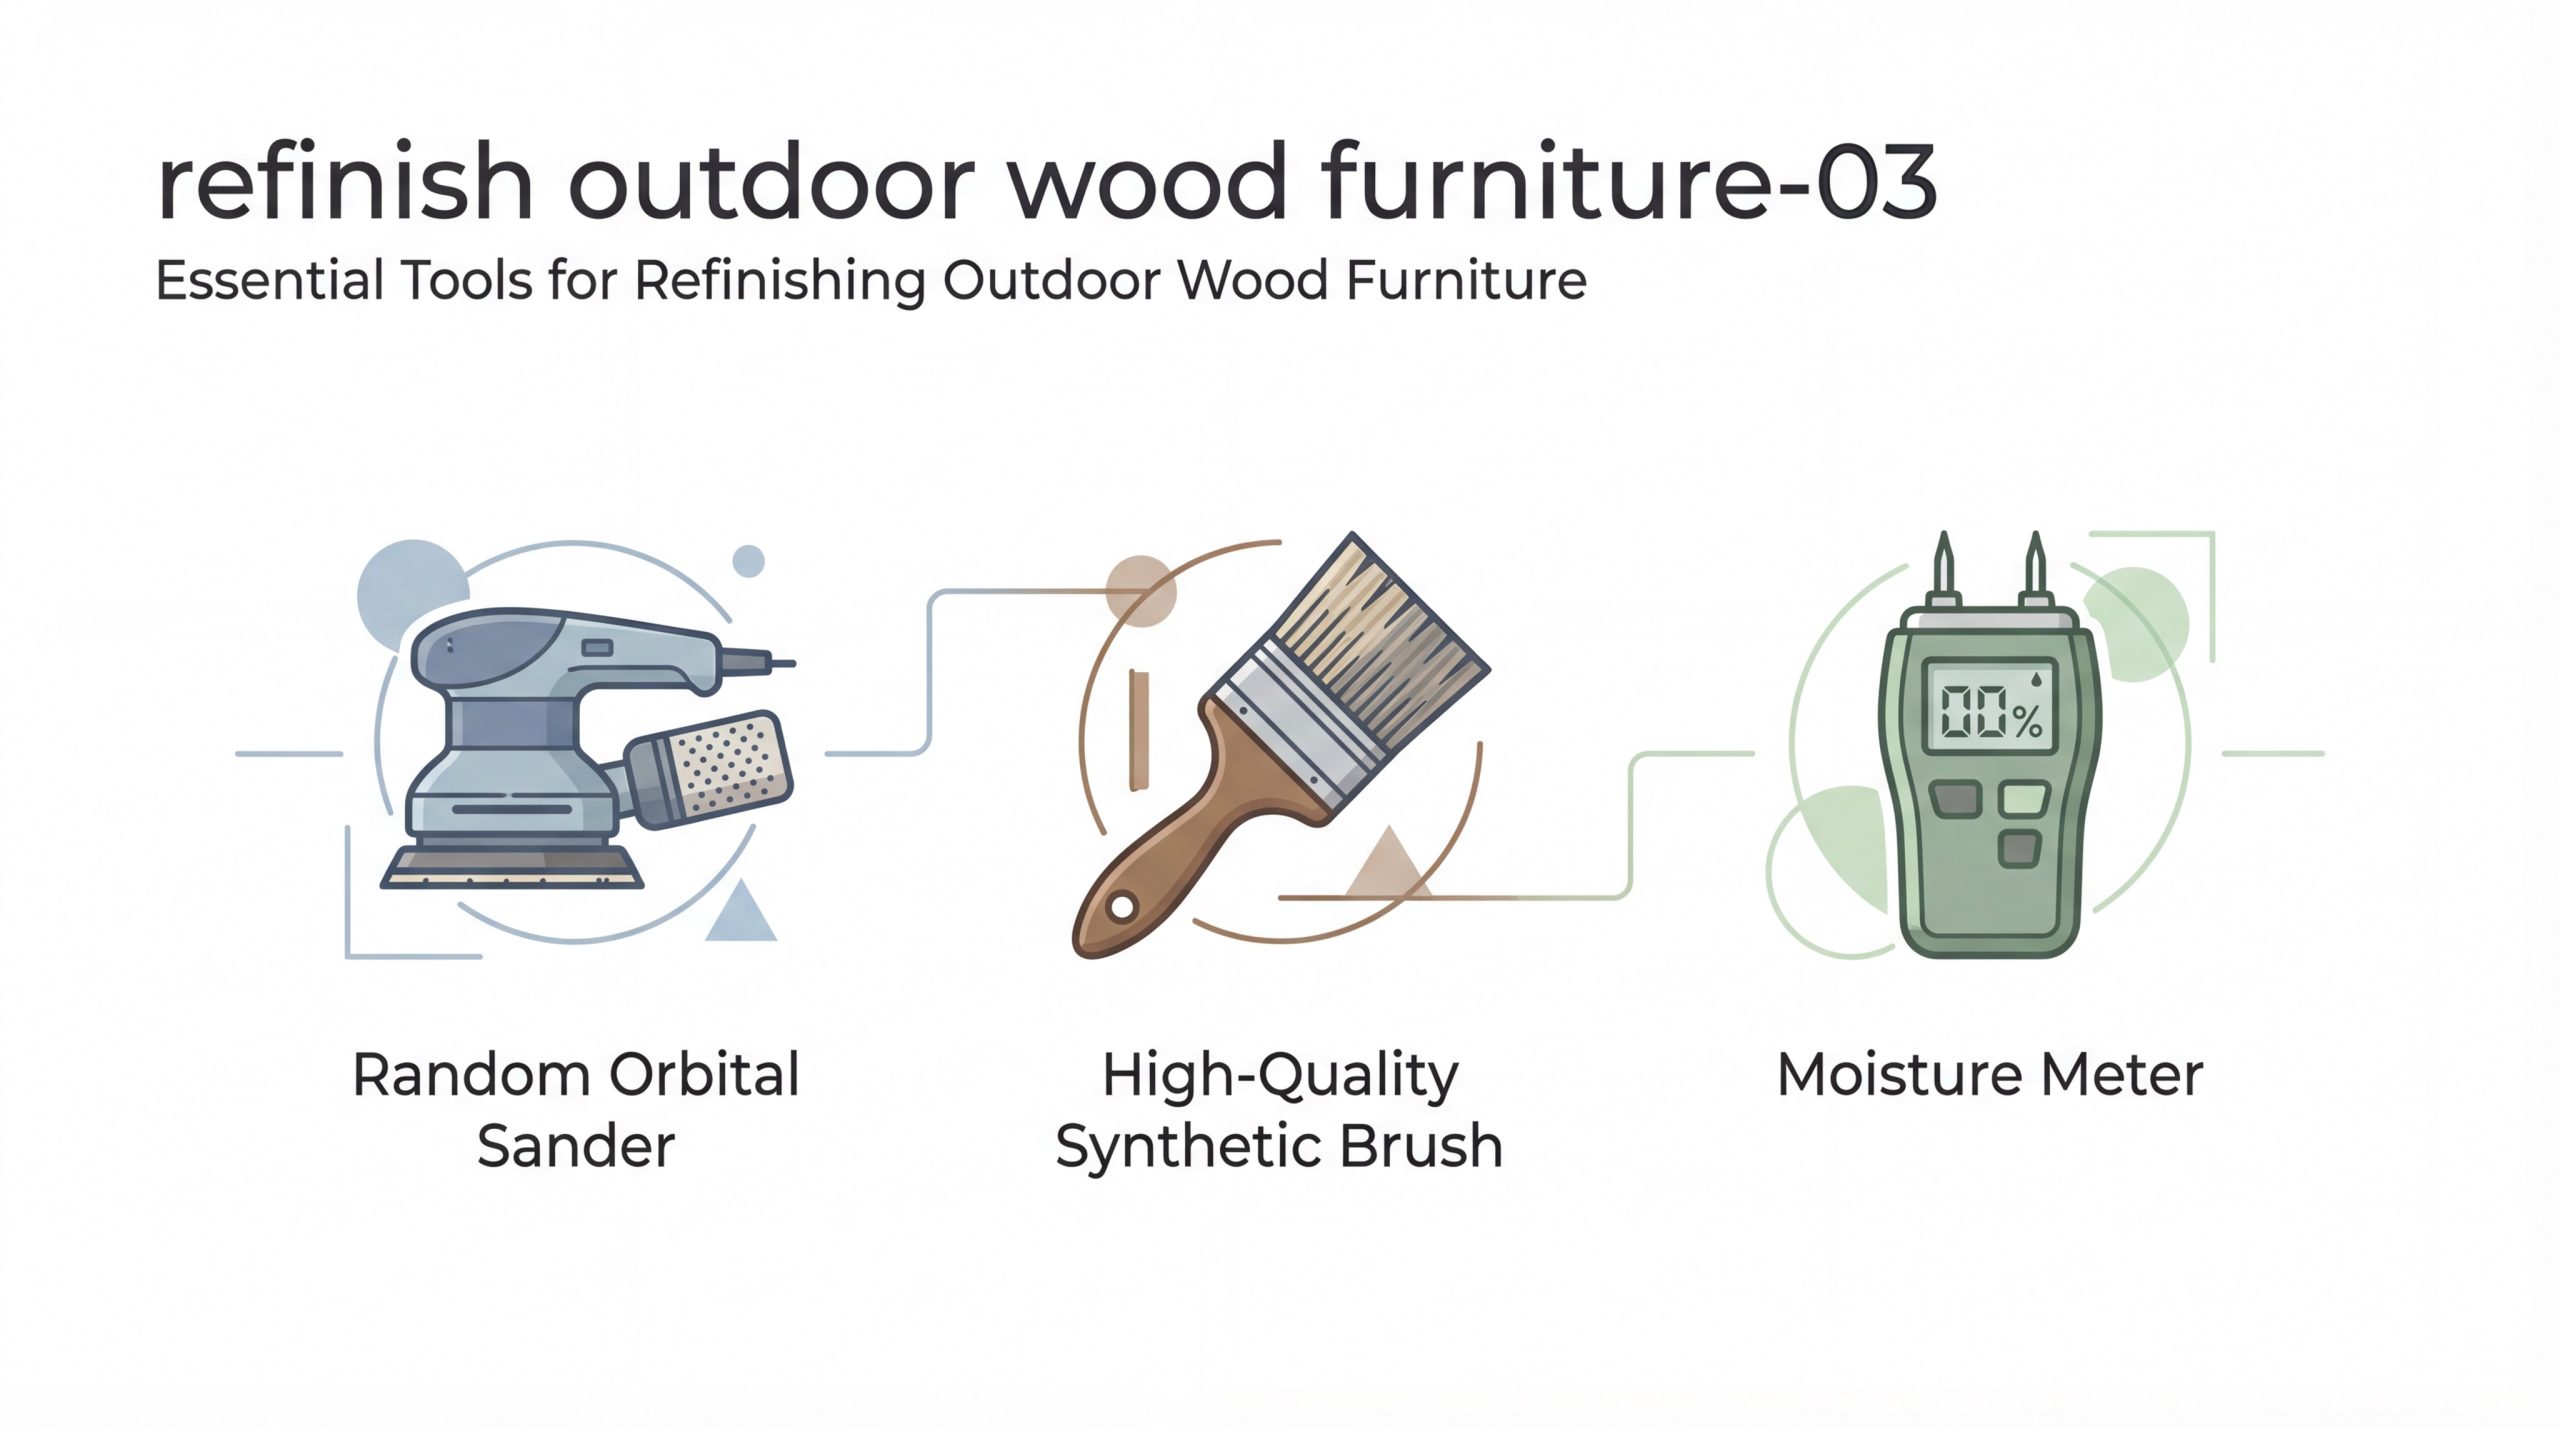
Investing in Professional Grade Equipment
You will find that using a random orbital sander with a dedicated dust extraction system not only speeds up the work but also provides a much more uniform surface for staining. Low-quality tools often leave “pigtail” swirl marks that become highly visible once the stain is applied, ruining the professional look of your project. Similarly, investing in high-quality synthetic brushes designed specifically for exterior stains will prevent shedding and ensure an even, streak-free application.
Understanding Factory Quality Standards
When you source new pieces from a specialized Shandong factory, you benefit from precision-cut joinery and wood that has been kiln-dried to an optimal 8-12% moisture content. This level of factory control prevents the warping and cracking that typically plague cheaper, air-dried outdoor pieces found in big-box stores. Furthermore, professional manufacturers often use FSC-certified wood and eco-friendly, water-based coatings that meet strict international safety and durability standards.
Choosing the Right Supply Partner
A reliable partner will provide you with detailed technical drawings and samples, ensuring that your large-scale orders meet your exact specifications for both style and durability. For retailers and importers, working with a factory that offers flexible MOQs allows for market testing without the risk of overstocking untested designs.
- Look for suppliers with a 3,000 m² production area and modern CNC machinery.
- Ensure the factory provides 100% shipment photo records for quality assurance.
- Verify that they offer after-sales support with clear solutions within 3 working days.
Review the standard sourcing requirements to ensure your next batch of furniture is built to last.
| Feature | Sourcing Standard | Benefit |
|---|---|---|
| Moisture Content | 8–12% | Prevents warping and cracking |
| Wood Source | FSC Certified | Sustainable and high-quality fibers |
| Finish Type | Water-based UV Coating | Eco-friendly and long-lasting protection |
Don’t settle for less.
Ready to start your next project?
Key Takeaway: High-quality tools and a professional manufacturing partner are the foundations of long-term success in the outdoor furniture market.
Frequently Asked Questions
Can I skip sanding if the wood looks okay?
You should never skip sanding, even if the wood appears fine, because a microscopic layer of “dead” silver wood fibers is almost always present on weathered pieces. This degraded layer will prevent your new finish from bonding to the healthy wood cells underneath, leading to premature peeling and a blotchy appearance within a few months. A quick pass with 120-grit sandpaper is essential to expose the “thirsty” wood that is capable of absorbing and holding onto the protective oils.
What is the best way to fix a sticky finish that won’t dry?
A sticky or tacky finish is usually caused by applying the product too thickly or in conditions that are too humid, preventing the oils from properly oxidizing and hardening. You can often fix this by wiping the surface down with a rag soaked in mineral spirits to remove the excess uncured resin without stripping the base layer. If the stickiness persists after a few days, you may need to lightly sand the surface and reapply a much thinner coat in a more controlled environment.
How do I know if my wood is dry enough to finish?
The most accurate way to check is to use a digital moisture meter, which should read below 12% for the most reliable finish adhesion. If you do not have a meter, you can perform a “tape test” by taping a small square of clear plastic to the wood and waiting 24 hours; if moisture appears under the plastic, the wood is still too wet to finish. Applying any sealer to wet wood will trap moisture inside, which will eventually cause the finish to bubble and promote internal rot.
Closing note
At EverWoody, we are committed to providing global importers and retailers with stable, high-quality wooden furniture solutions that stand the test of time. Our mission is to combine traditional craftsmanship with modern manufacturing precision to ensure every piece we produce enhances your brand’s reputation for excellence. Whether you need custom designs or reliable repeat orders, we are here to support your growth with worry-free shipments and expert technical guidance. For inquiries or to request a factory quote, please contact us today.