
Furniture defects post-approval destroy profit margins and brand reputation. Small errors in the furniture sample inspection workflow escalate into mass-produced disasters. Establish rigorous handoff protocols today to secure your inventory’s quality.
A furniture sample inspection workflow is the systematic transition from an approved “Golden Sample” to mass production. It involves material verification, setting tolerance limits, and formalizing quality standards to ensure every unit mirrors the approved prototype’s craftsmanship, functionality, and structural integrity during bulk manufacturing.
I.Defining the Handoff Boundaries for Furniture Sample Inspection Workflow

Formalizing the Technical Documentation Package
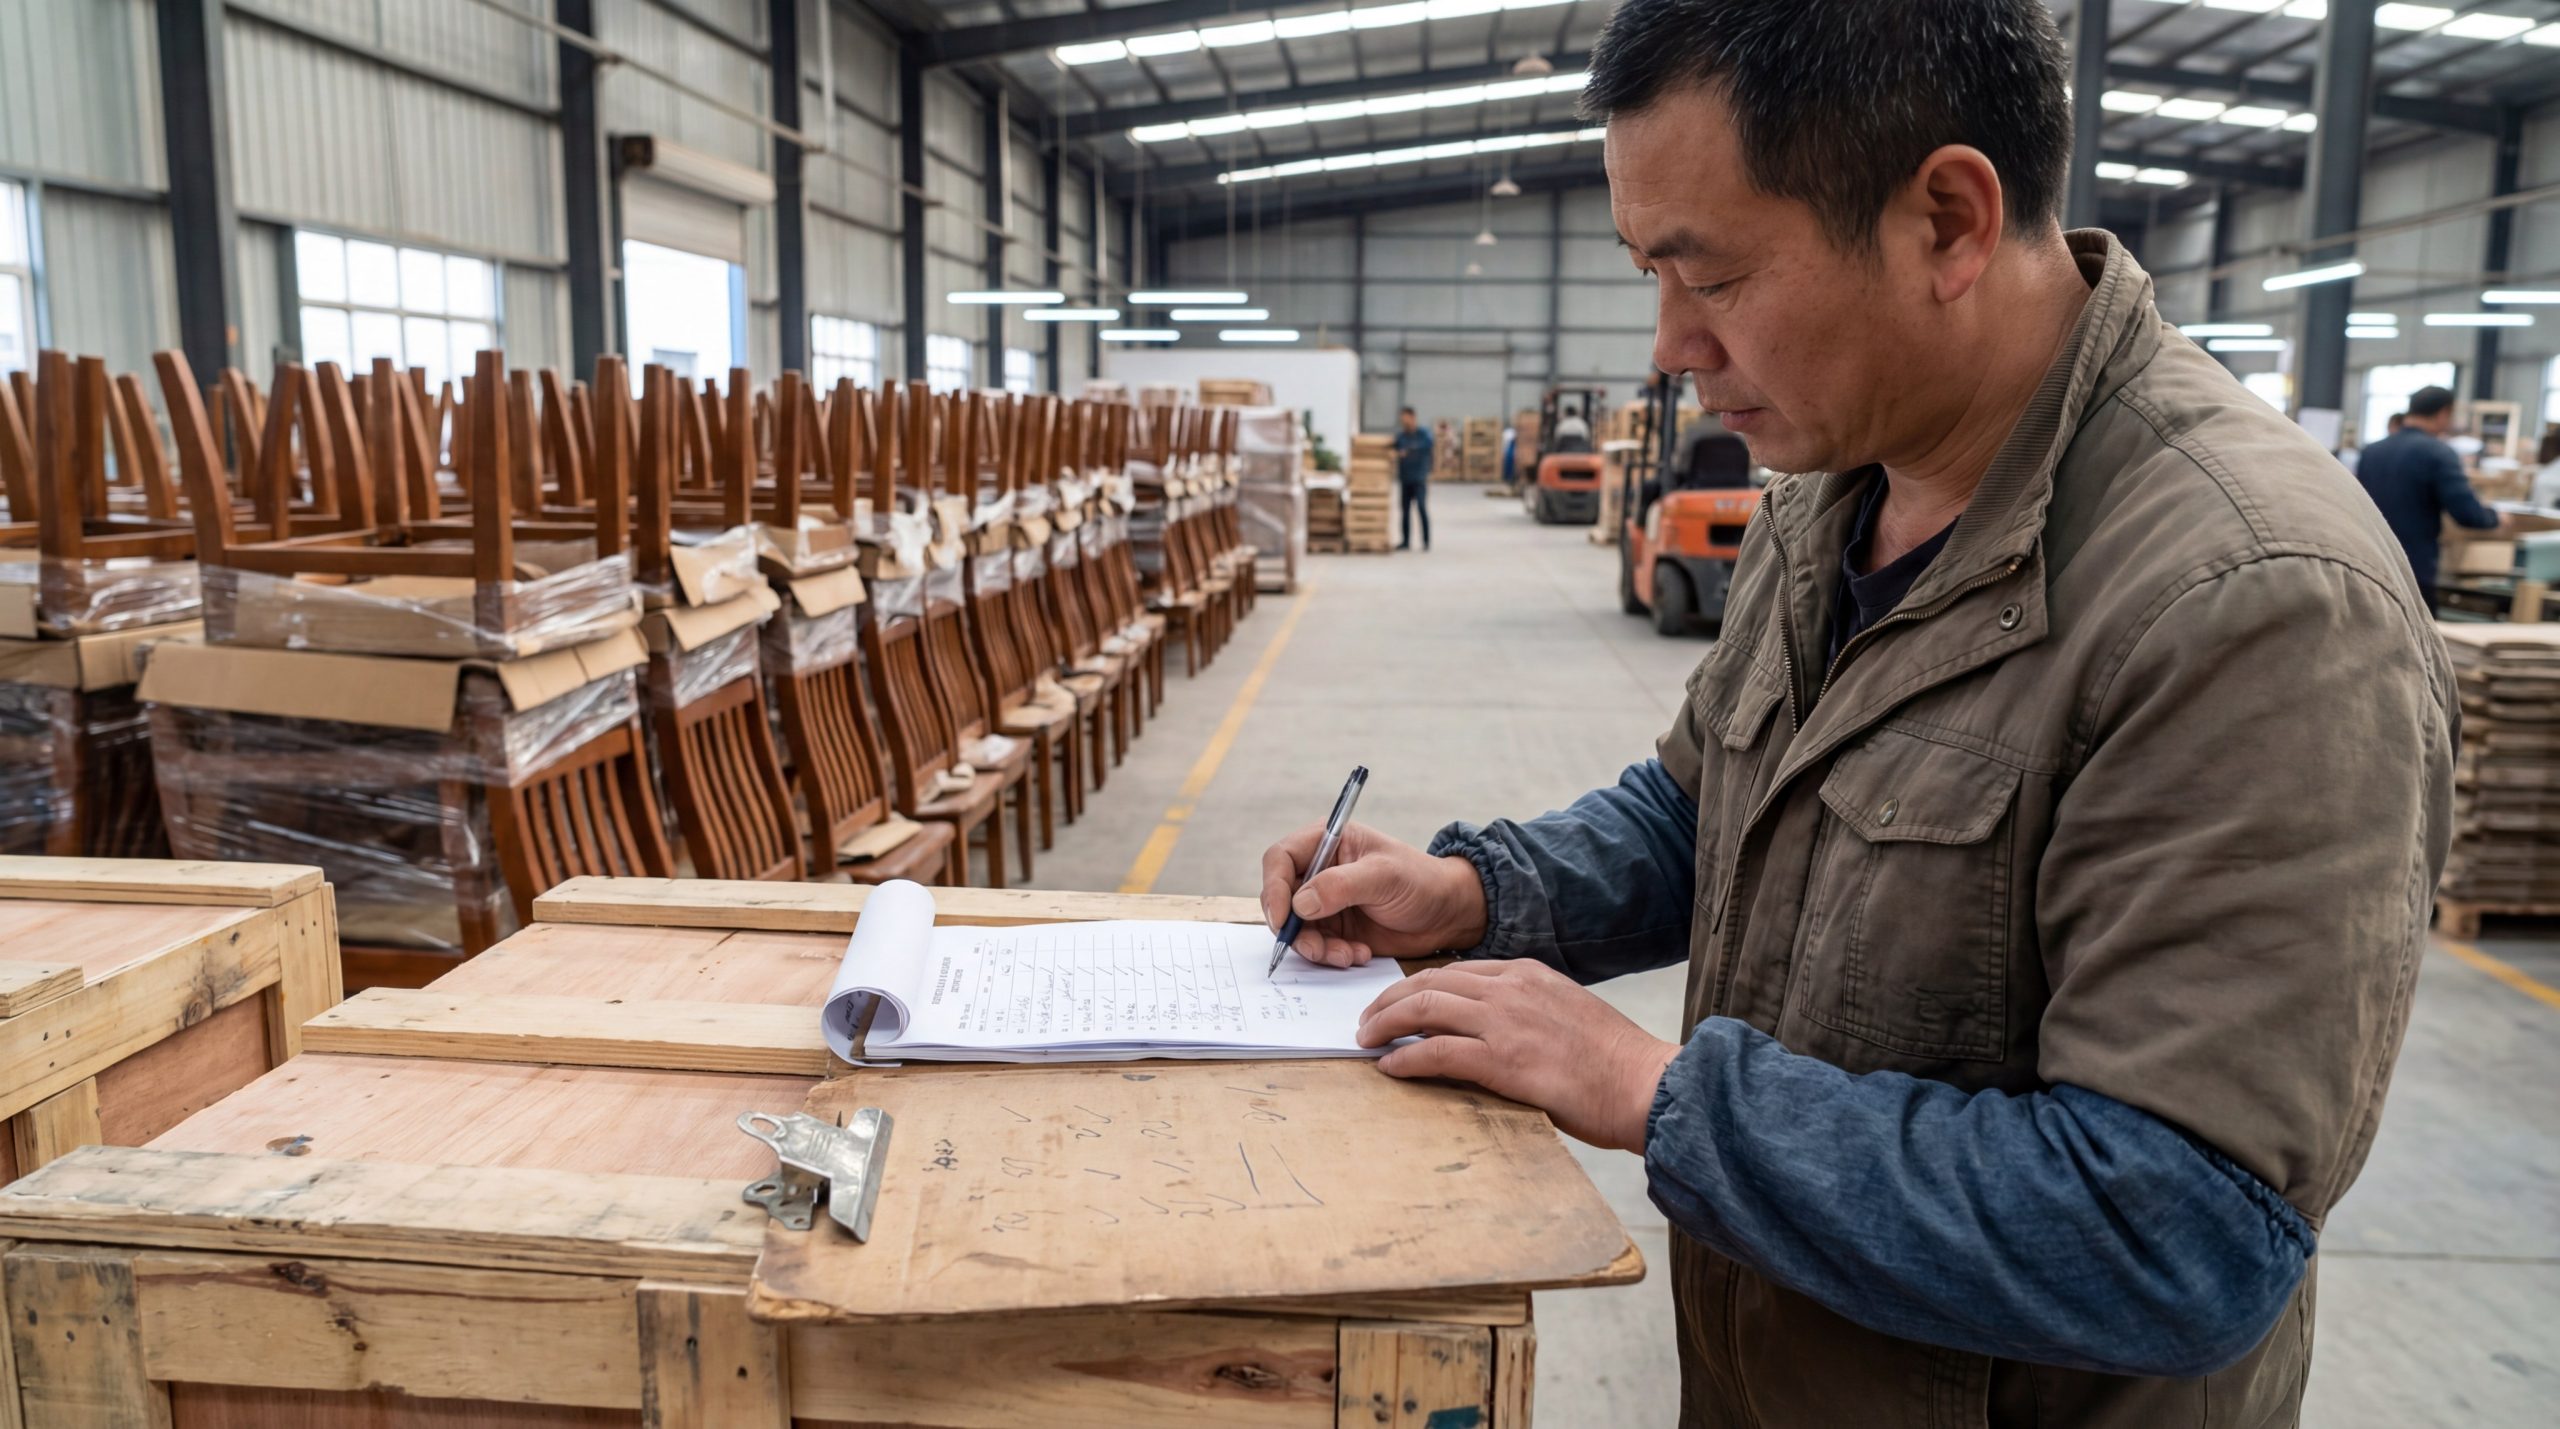
In the high-stakes environment of a Shandong furniture factory, the furniture sample inspection workflow must begin with an ironclad documentation package that translates the aesthetic nuances of a designer’s prototype into the rigid technical language required for successful mass production. You need to verify that all Bill of Materials (BOM) entries, technical drawings, and aesthetic benchmarks are not just signed off, but fully understood by the workshop floor managers who will oversee the actual crafting of your pieces. This stage prevents the “gray zone” of interpretation where a factory worker might substitute a core material based on availability rather than the specific density requirements outlined in your original wooden furniture production agreement.
- Comprehensive Bill of Materials (BOM) with Grade-A specifications.
- Detailed 2D/3D technical drawings featuring exploded views of joints.
- Signed aesthetic reference photos highlighting wood grain expectations.
- Master production timeline with integrated QC checkpoints.
Aligning Production Teams with Prototype Standards
Success in mass production is rarely about the first unit and always about the five-hundredth, which is why your furniture sample inspection workflow must include a formal departmental handoff meeting between the sample makers and the bulk production team. The craftsmen who hand-built your golden sample possess tacit knowledge regarding wood tension and assembly sequences that must be explicitly transferred to the line workers who operate the CNC machinery and assembly jigs.
Think of it this way: The gap between a prototype and production is where most defects are born, so you must bridge that gap with direct communication.
Establishing the “No-Go” Quality Gates
Before any timber is moved to the cutting floor, the furniture sample inspection workflow requires the establishment of “No-Go” gates where production is halted if certain criteria are not met. These gates serve as a defensive perimeter against systemic failures, ensuring that if a material batch fails a moisture test or a hardware finish doesn’t match the approved sample, the issue is rectified before value-added labor is wasted.
Key Takeaway: Clear handoff boundaries transform a subjective “good enough” attitude into an objective, data-driven manufacturing process.
| Handoff Stage | Key Stakeholders | Primary Deliverable | Status Verification |
|---|---|---|---|
| Documentation Review | Engineering & QA | Technical Data Sheet | Dual Signature Sign-off |
| Tooling Alignment | Production Manager | CNC Program Validation | First-Piece Comparison |
| Material Staging | Procurement & QC | Verified Raw Stock | Lab Test Certification |
| Packaging Protocol | Logistics & QC | Drop-Test Approval | Signed Packaging Spec |
The table above illustrates the critical handoff points that must be verified to ensure the workflow transitions smoothly into active manufacturing.
II. Pinpointing the Transition from Golden Sample to Production Standards

Translating Aesthetic Samples into Quantitative Metrics
The primary challenge in moving from a single approved unit to bulk is the loss of detail, making it essential to quantify the “feeling” of the golden sample into measurable production standards. You must take the smooth finish or the specific weight of the prototype and assign numerical values to them, such as gloss percentages or density kilograms per cubic meter, to ensure the factory can replicate these traits consistently. This quantification is the backbone of a professional quality control standards framework that leaves no room for the factory to claim that “natural variation” accounts for a drop in craftsmanship.
- Numerical gloss levels measured by a gloss meter.
- Weight tolerances for solid wood components (+/- 5%).
- Specific moisture content ranges for different climates (8-12%).
- Measurable sanding grit sequences (e.g., 180 to 240 to 320).
Synchronizing Machine Calibration with Hand-Crafted Details
When your golden sample is hand-finished by a master carpenter in Shandong, the production line must be calibrated to mimic those specific nuances through automated precision. You need to ensure that the CNC routing paths and the pressure settings on the edge-banding machines are tuned to match the tight tolerances achieved during the sample phase, preventing the loose joints or uneven edges that often plague bulk orders.
The bottom line is: If the machine isn’t told exactly how to replicate the master’s touch, it will default to the easiest path, not the best one.
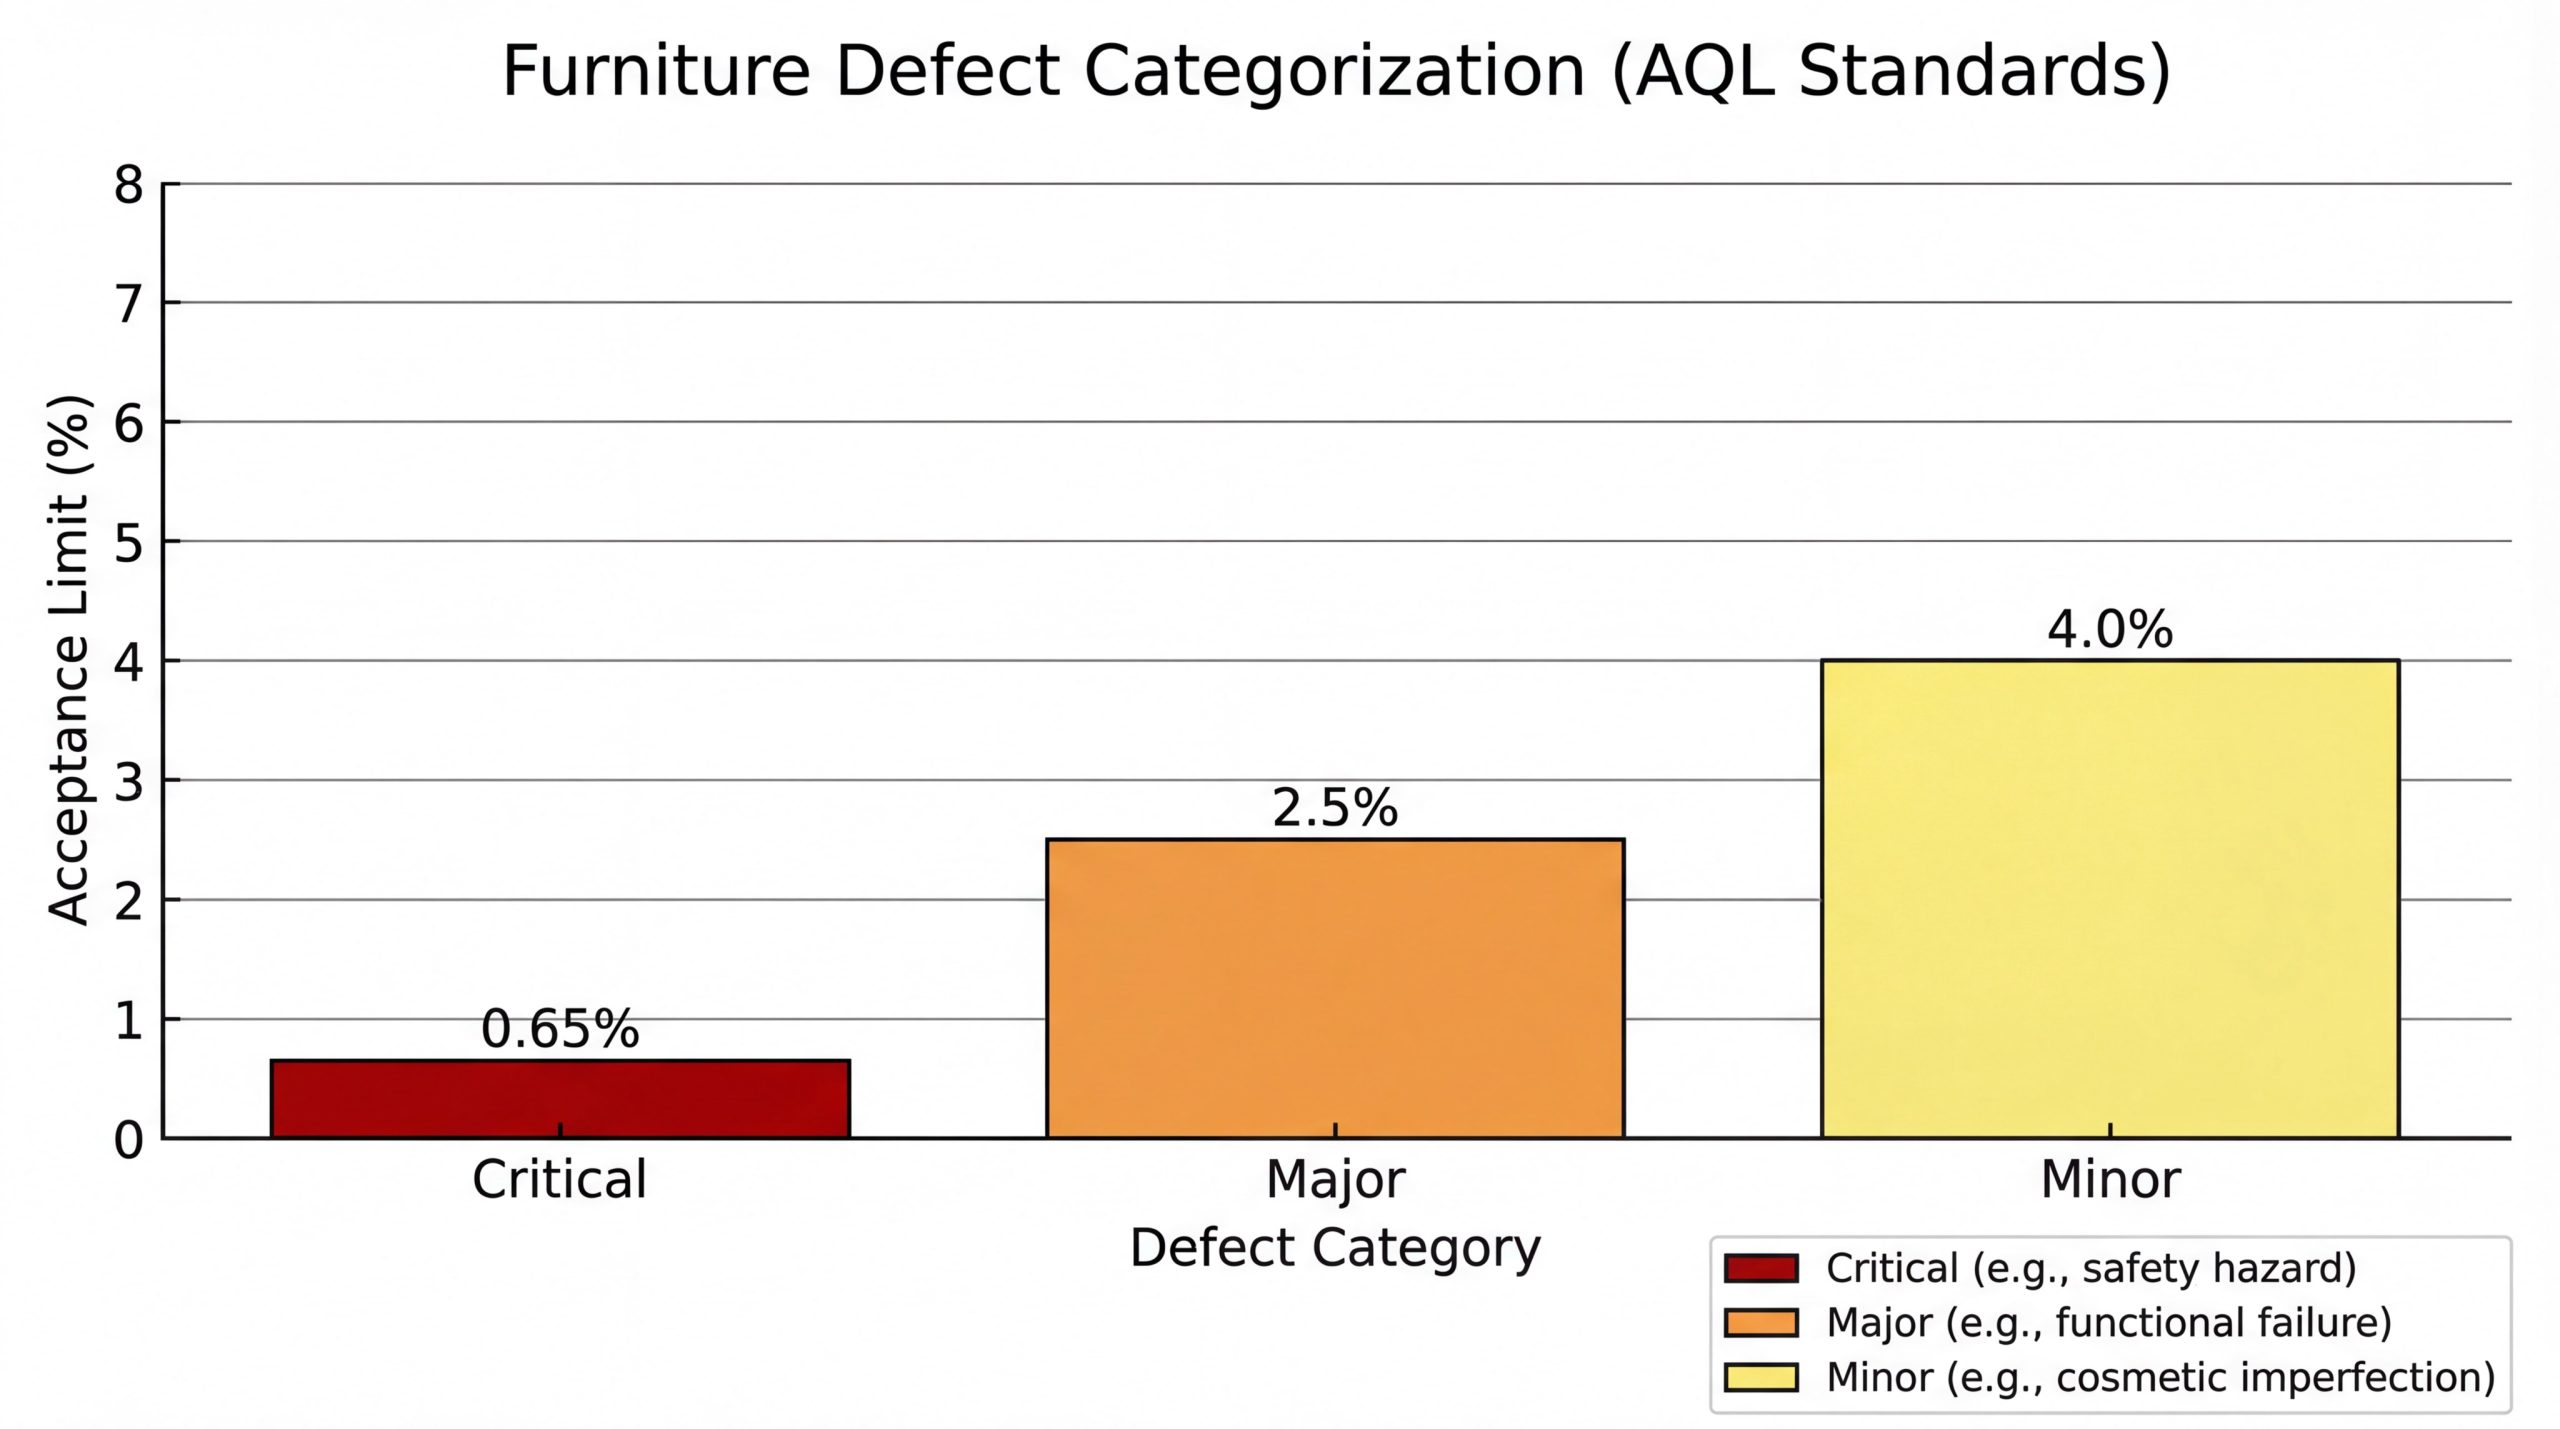
Defining the Acceptance Quality Limit (AQL)
Transitioning to production means accepting that perfection at scale is impossible, so you must define what constitutes a minor, major, or critical defect before the first unit rolls off the line. By setting these AQL levels early, you provide the factory with a clear understanding of what will be rejected during the final furniture sample inspection workflow phase, motivating them to maintain higher standards from the start.
Key Takeaway: Transitioning standards from “look and feel” to “measure and verify” is the only way to maintain quality at scale.
| Feature | Golden Sample Standard | Production Tolerance | Judgment |
|---|---|---|---|
| Joinery Gap | 0.0mm (Zero gap) | < 0.2mm (Tight fit) | Pass/Fail |
| Surface Finish | Hand-rubbed Oil | Machine-sprayed UV | Comparative Match |
| Dimension | Exact to Design | +/- 2mm | Functional Pass |
| Wood Grain | Premium Selected | Commercial Grade | Variance Acceptable |
This comparison highlights where production standards must either match the sample exactly or allow for realistic manufacturing variances.
III. Identifying Material Consistency Checks within the Furniture Sample Inspection Workflow
Verifying Timber Species and Grade Integrity
One of the most common gray zones in furniture manufacturing is the substitution of secondary wood species or lower-grade timber in bulk production compared to the premium materials used in the golden sample. Within your furniture sample inspection workflow, you must conduct random “deep dives” into the wood stacks to ensure the oak or walnut being cut matches the density, grain pattern, and sustainability certifications of the approved prototype. Failure to catch a species downgrade at this stage will result in structural issues or finish discrepancies that cannot be fixed once the furniture is assembled.
- Cross-referencing wood grain patterns with the master swatch.
- Verifying FSC or PEFC certification stamps on raw timber.
- Checking for prohibited defects like knots, sapwood, or mineral streaks.
- Density testing using the displacement method for core materials.
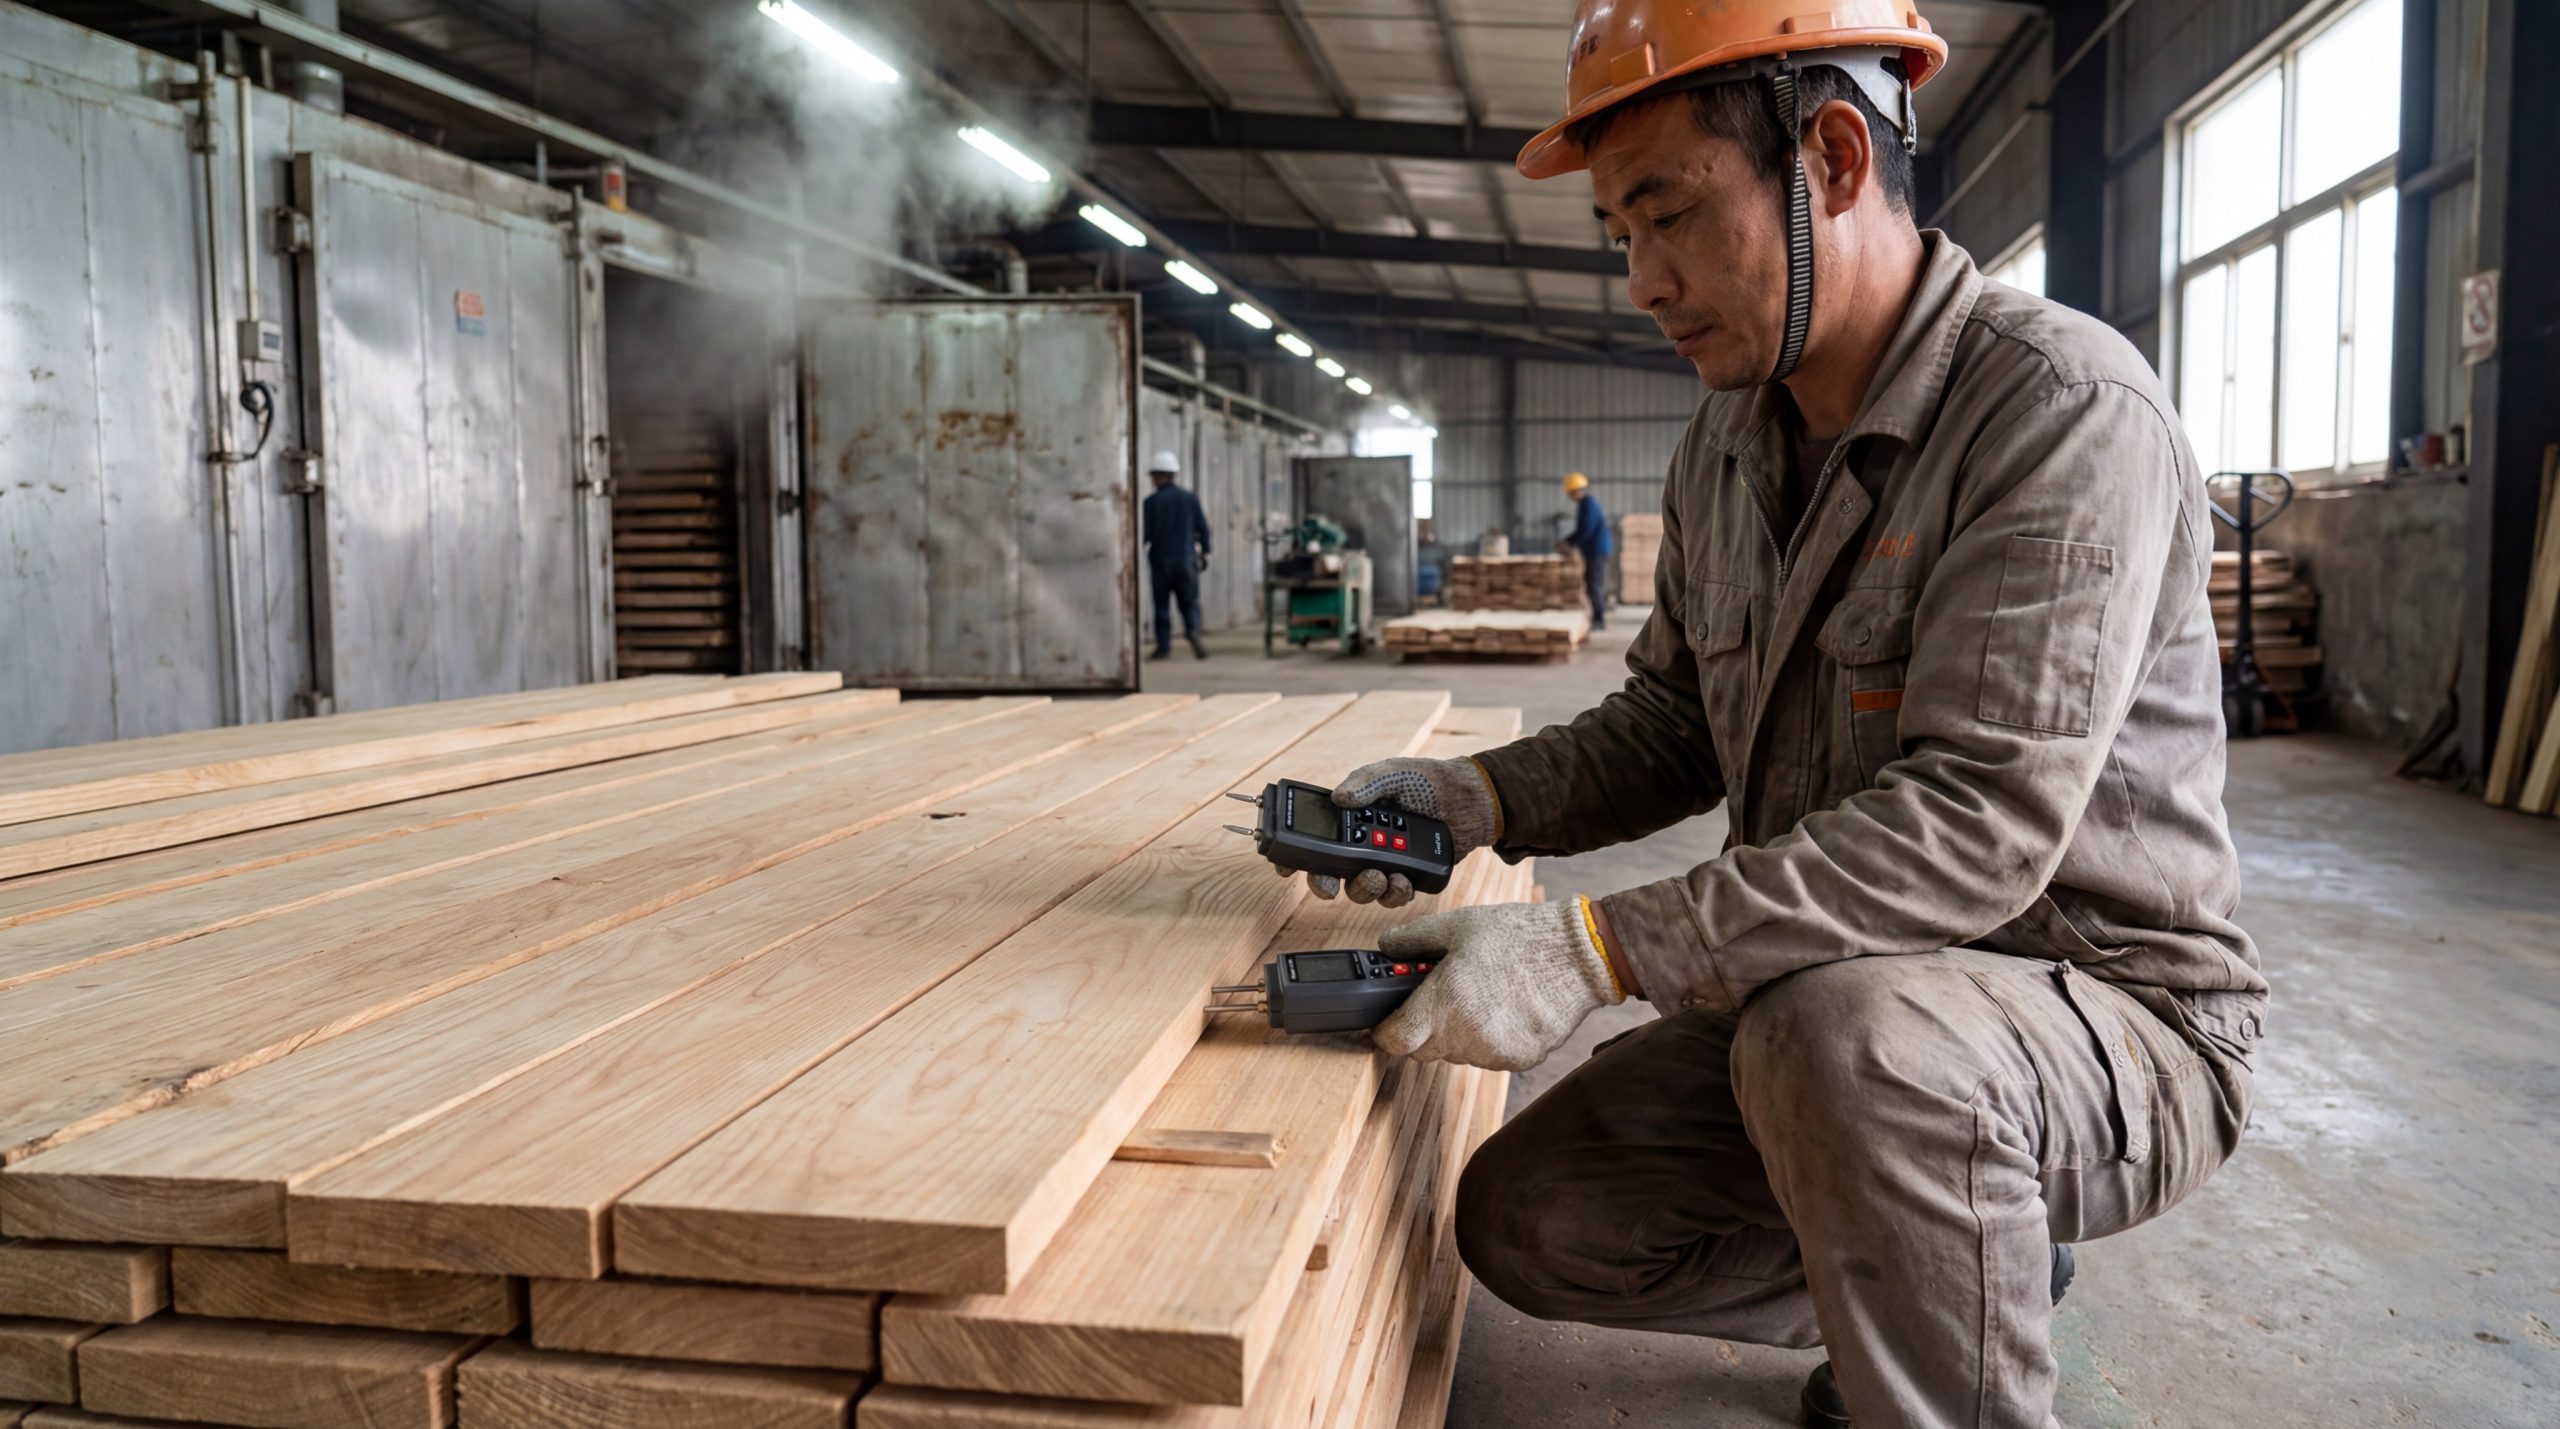
Monitoring Moisture Content for Long-Term Stability
In the humid summers and dry winters of northern China, wood movement is a constant threat, making moisture content (MC) testing a non-negotiable step in your inspection process. You must ensure the factory uses calibrated moisture meters to check timber at multiple points—kiln-out, pre-cutting, and post-assembly—to guarantee the wood is stabilized for its final destination’s climate.
Here is the deal: Wood that is too wet will shrink and crack in a heated home, while wood that is too dry will swell and warp in humid environments.
Testing Adhesive and Coating Compatibility
The chemical components used in furniture, such as glues and lacquers, often vary between small sample runs and mass production due to cost-cutting measures at the factory level. You need to verify that the adhesives used in your custom furniture manufacturing process are the same high-bond, low-VOC options specified in your sample, as cheaper alternatives can lead to joint failure or “blooming” in the finish over time.
Key Takeaway: Material consistency is the foundation of structural longevity; never assume the bulk wood matches the sample wood without verification.
| Material Type | Sample Specification | Production Batch | Testing Method |
|---|---|---|---|
| Solid Oak | Grade A FAS | Grade A/B Mix | Visual & Density |
| Wood Glue | PVA D3 Water-resistant | Standard PVA | Shear Strength Test |
| Top Coat | Polyurethane 20% Gloss | NC Lacquer 20% Gloss | Solvent Rub Test |
| Veneer | 0.6mm Crown Cut | 0.4mm Quarter Cut | Micrometer Check |
The analysis shows that even slight deviations in material specifications can lead to significant drops in the final product’s durability and value.
IV. Establishing Functional Tolerance Limits in Your Furniture Sample Inspection Workflow

Quantifying Allowable Dimensional Variance
In the world of mass production, “perfect” is the enemy of “delivered,” which is why you must establish clear dimensional tolerances for every component of your furniture. You need to define exactly how many millimeters a tabletop can deviate in length or how much a chair leg can vary in height before it is considered a defect. This clarity prevents disputes with the factory and ensures that even with natural wood movement, the final product remains functional and aesthetically pleasing.
- Leg height variance limits (typically +/- 1mm to prevent wobbling).
- Overall length/width tolerances (+/- 2-3mm for large items).
- Component thickness standards (+/- 0.5mm for panels).
- Drawer box squareness tolerances (diagonal difference < 2mm).
Setting Performance Standards for Moving Parts
Drawers, doors, and extension mechanisms often feel smooth on a single sample but can become sticky or misaligned during a bulk run. Your furniture sample inspection workflow must include a “stress tolerance” for these movements, defining the force required to open a drawer or the allowable gap between a door and its frame.
Make no mistake: A beautiful cabinet is worthless to a customer if the doors don’t close flush or the drawers require a heavy tug to operate.
Validating Weight-Bearing and Stability Limits
Stability is a major safety concern, and while the golden sample might be rock-solid, production units might suffer from weakened joints or lighter-weight materials. You must establish a protocol for static load testing on production samples to ensure they can handle the intended weight without bowing or catastrophic failure.
Key Takeaway: Functional tolerances provide the factory with a clear “pass/fail” zone, eliminating the subjective arguments that lead to quality degradation.
| Functional Check | Ideal Standard | Acceptable Tolerance | Critical Failure |
|---|---|---|---|
| Chair Stability | Zero wobble | < 0.5mm air gap | > 2mm wobble |
| Drawer Slide | Silent & Smooth | Slight friction OK | Sticking/Jamming |
| Door Alignment | Perfectly flush | < 1mm vertical offset | Visual sagging |
| Weight Load | 150kg Static | No visible bowing | Audible cracking |
This table serves as a judgmental guide for inspectors to determine when a functional variance becomes a rejectable defect.
V. Locking Down Hardware Specifications for Bulk Production
Auditing Hardware Sources and Brands
Hardware is the most frequently substituted component in the furniture industry because high-quality hinges and slides are expensive. You must verify that the brand and model of hardware used in your production run exactly match what was approved in the furniture sample inspection workflow, as unbranded clones often fail within months of use. Ask for invoices or packaging from the hardware supplier to confirm that the factory is not “mixing and matching” premium parts with generic alternatives.
- Verification of brand logo embossing on hinges and slides.
- Matching screw sizes and finishes to the approved sample.
- Checking for Soft-Close or Push-to-Open functionality.
- Verifying the load rating of drawer runners (e.g., 35kg vs. 45kg).
Testing Surface Finish Durability on Metal Components
The finish on handles, knobs, and decorative metalwork can tarnish or peel if the plating process is rushed in mass production. You should implement a basic salt spray test or a cross-hatch adhesion test on hardware samples from the bulk lot to ensure the finish will withstand the oils from human hands and cleaning chemicals.
Let’s be honest: Nothing makes a premium piece of furniture look cheap faster than a drawer handle that loses its gold plating after three weeks of use.
Verifying Installation Precision and Alignment
Even high-quality hardware will fail if it is installed incorrectly, so your inspection must focus on the precision of pre-drilled holes and the torque applied to screws. You need to ensure that the factory isn’t stripping screws with over-powered drills or mounting hinges at slight angles, which creates unnecessary stress on the wood and leads to premature failure.
Key Takeaway: Hardware is the “engine” of your furniture; if the engine is a cheap knock-off, the car won’t drive for long.
| Hardware Item | Approved Specification | Production Audit | Action if Mismatched |
|---|---|---|---|
| Door Hinges | Blum Soft-Close 110° | Generic 110° | Reject Entire Batch |
| Drawer Slides | Under-mount Hidden | Side-mount Ball | Require Re-work |
| Handles | Solid Brass / Brushed | Zinc Alloy / Plated | Negotiate Discount |
| Assembly Cam | 15mm Steel Cam | 12mm Zinc Cam | Reject for Safety |
This summary ensures that your procurement team and QC inspectors are aligned on the non-negotiable nature of hardware specifications.
VI. Verifying Structural Integrity Protocols Post-Approval
Assessing Joint Construction and Glue Coverage
The “bones” of your furniture are its joints, and while the golden sample likely featured perfect mortise-and-tenon work, mass production may see a shift toward simpler, weaker dowel joints or staples. You must insist on “destructive testing” of at least one production unit to verify that the internal joinery matches the technical drawings and that glue coverage is sufficient for a permanent bond. This step in the furniture sample inspection workflow is the only way to see what is hidden beneath the veneer or paint.
- Pull-apart tests on randomly selected joints.
- Verifying the presence of corner blocks and reinforcing screws.
- Checking for “starved” glue joints where the wood is dry.
- Auditing the depth of tenons to ensure they aren’t “short-shipped.”
Evaluating the Rigidity of Assembled Units
A furniture piece that feels sturdy in a showroom can become “racked” or shaky during shipping if the structural design isn’t robust enough for the rigors of global logistics. You need to perform a racking test by applying lateral pressure to the top of the piece and measuring the degree of flex, ensuring it stays within the safety limits established during the sample phase.
The simple truth is: If the unit flexes more than 5mm under moderate pressure, it will likely suffer structural damage before it reaches the customer.
Checking for Structural Defects in Panel Products
For furniture using MDF or plywood, you must check for internal voids or delamination that could compromise the integrity of the piece. You should inspect the edges of panels before they are banded to ensure the core is dense and free of air pockets that would weaken screw-holding power.
Key Takeaway: Structural integrity cannot be judged by the surface; you must look at the joinery and core materials to ensure true quality.
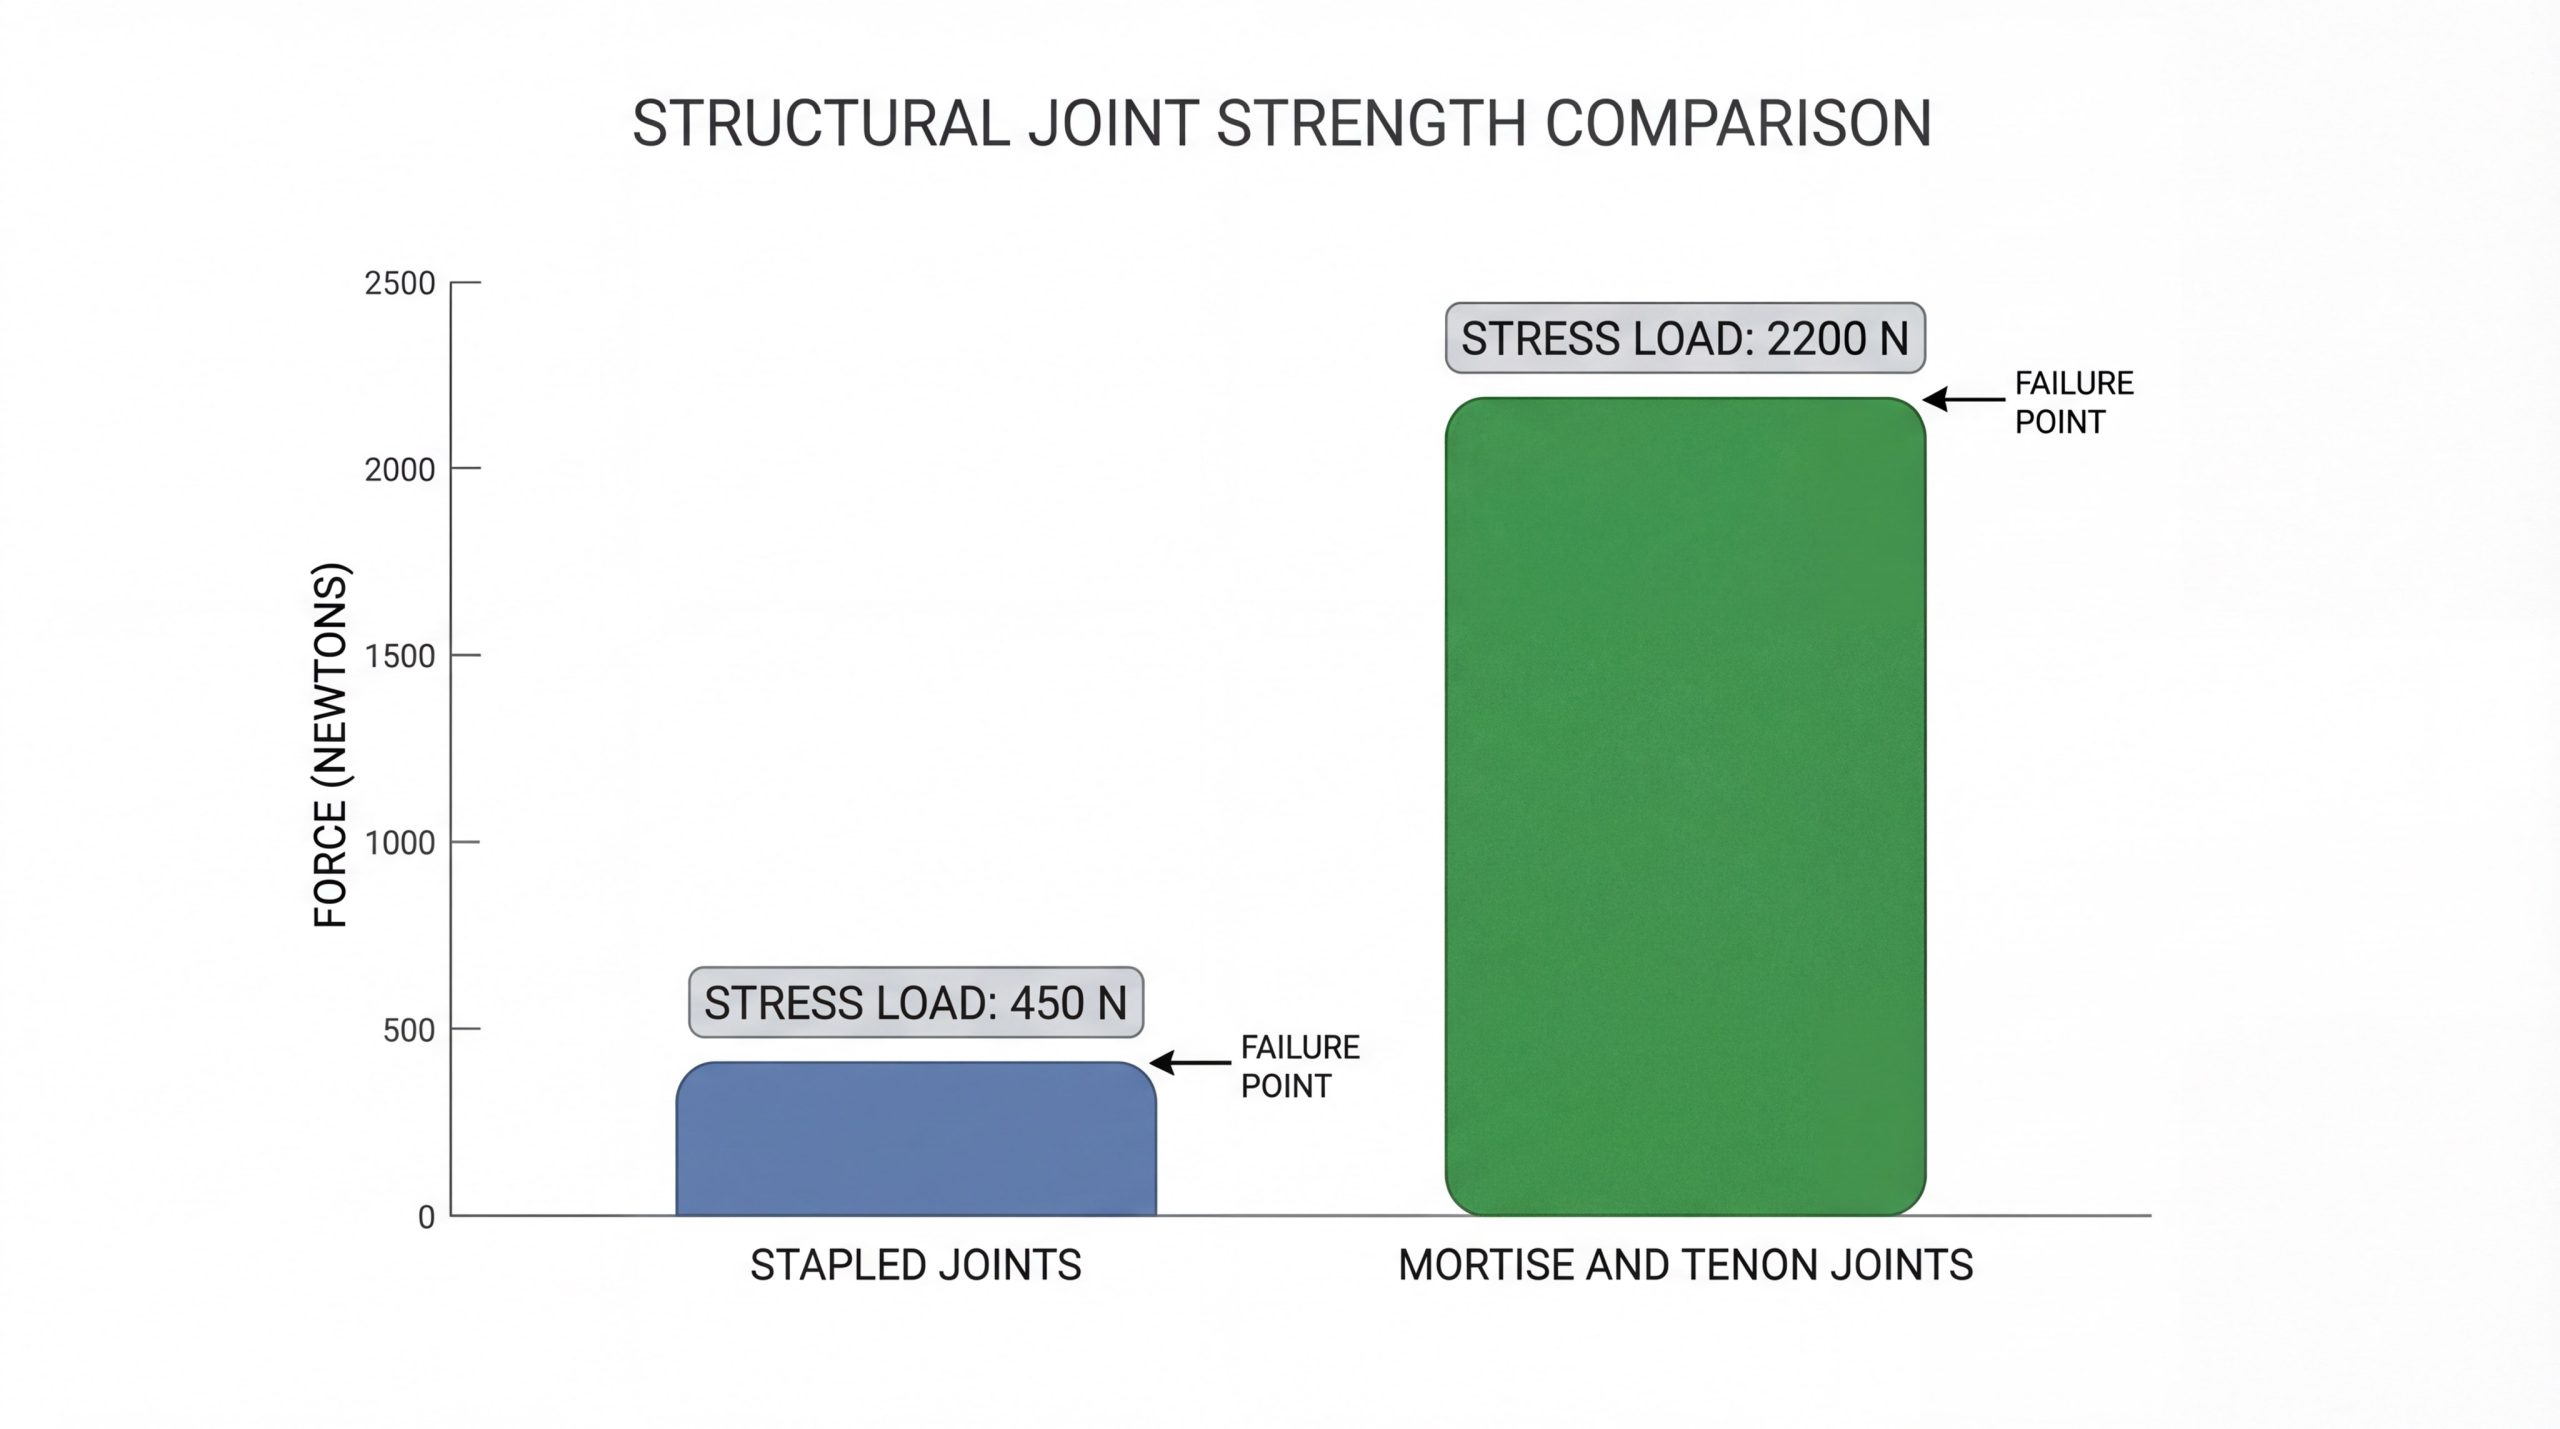
| Joint Type | Load Capacity (N) | Failure Mode | Durability Rating |
|---|---|---|---|
| Mortise & Tenon | 2200+ | Wood Splitting | High / Commercial |
| Dowel Joint | 1200 | Glue Failure | Medium / Residential |
| Cam-Lock (RTA) | 800 | Hardware Bending | Low / Economy |
| Pocket Screw | 1500 | Screw Pull-out | Medium-High |
This comparative table highlights why maintaining the joinery standards of the golden sample is critical for long-term product performance.
VII. Validating Color and Finish Variance within the Furniture Sample Inspection Workflow
Establishing a “Range Board” for Natural Wood Variance
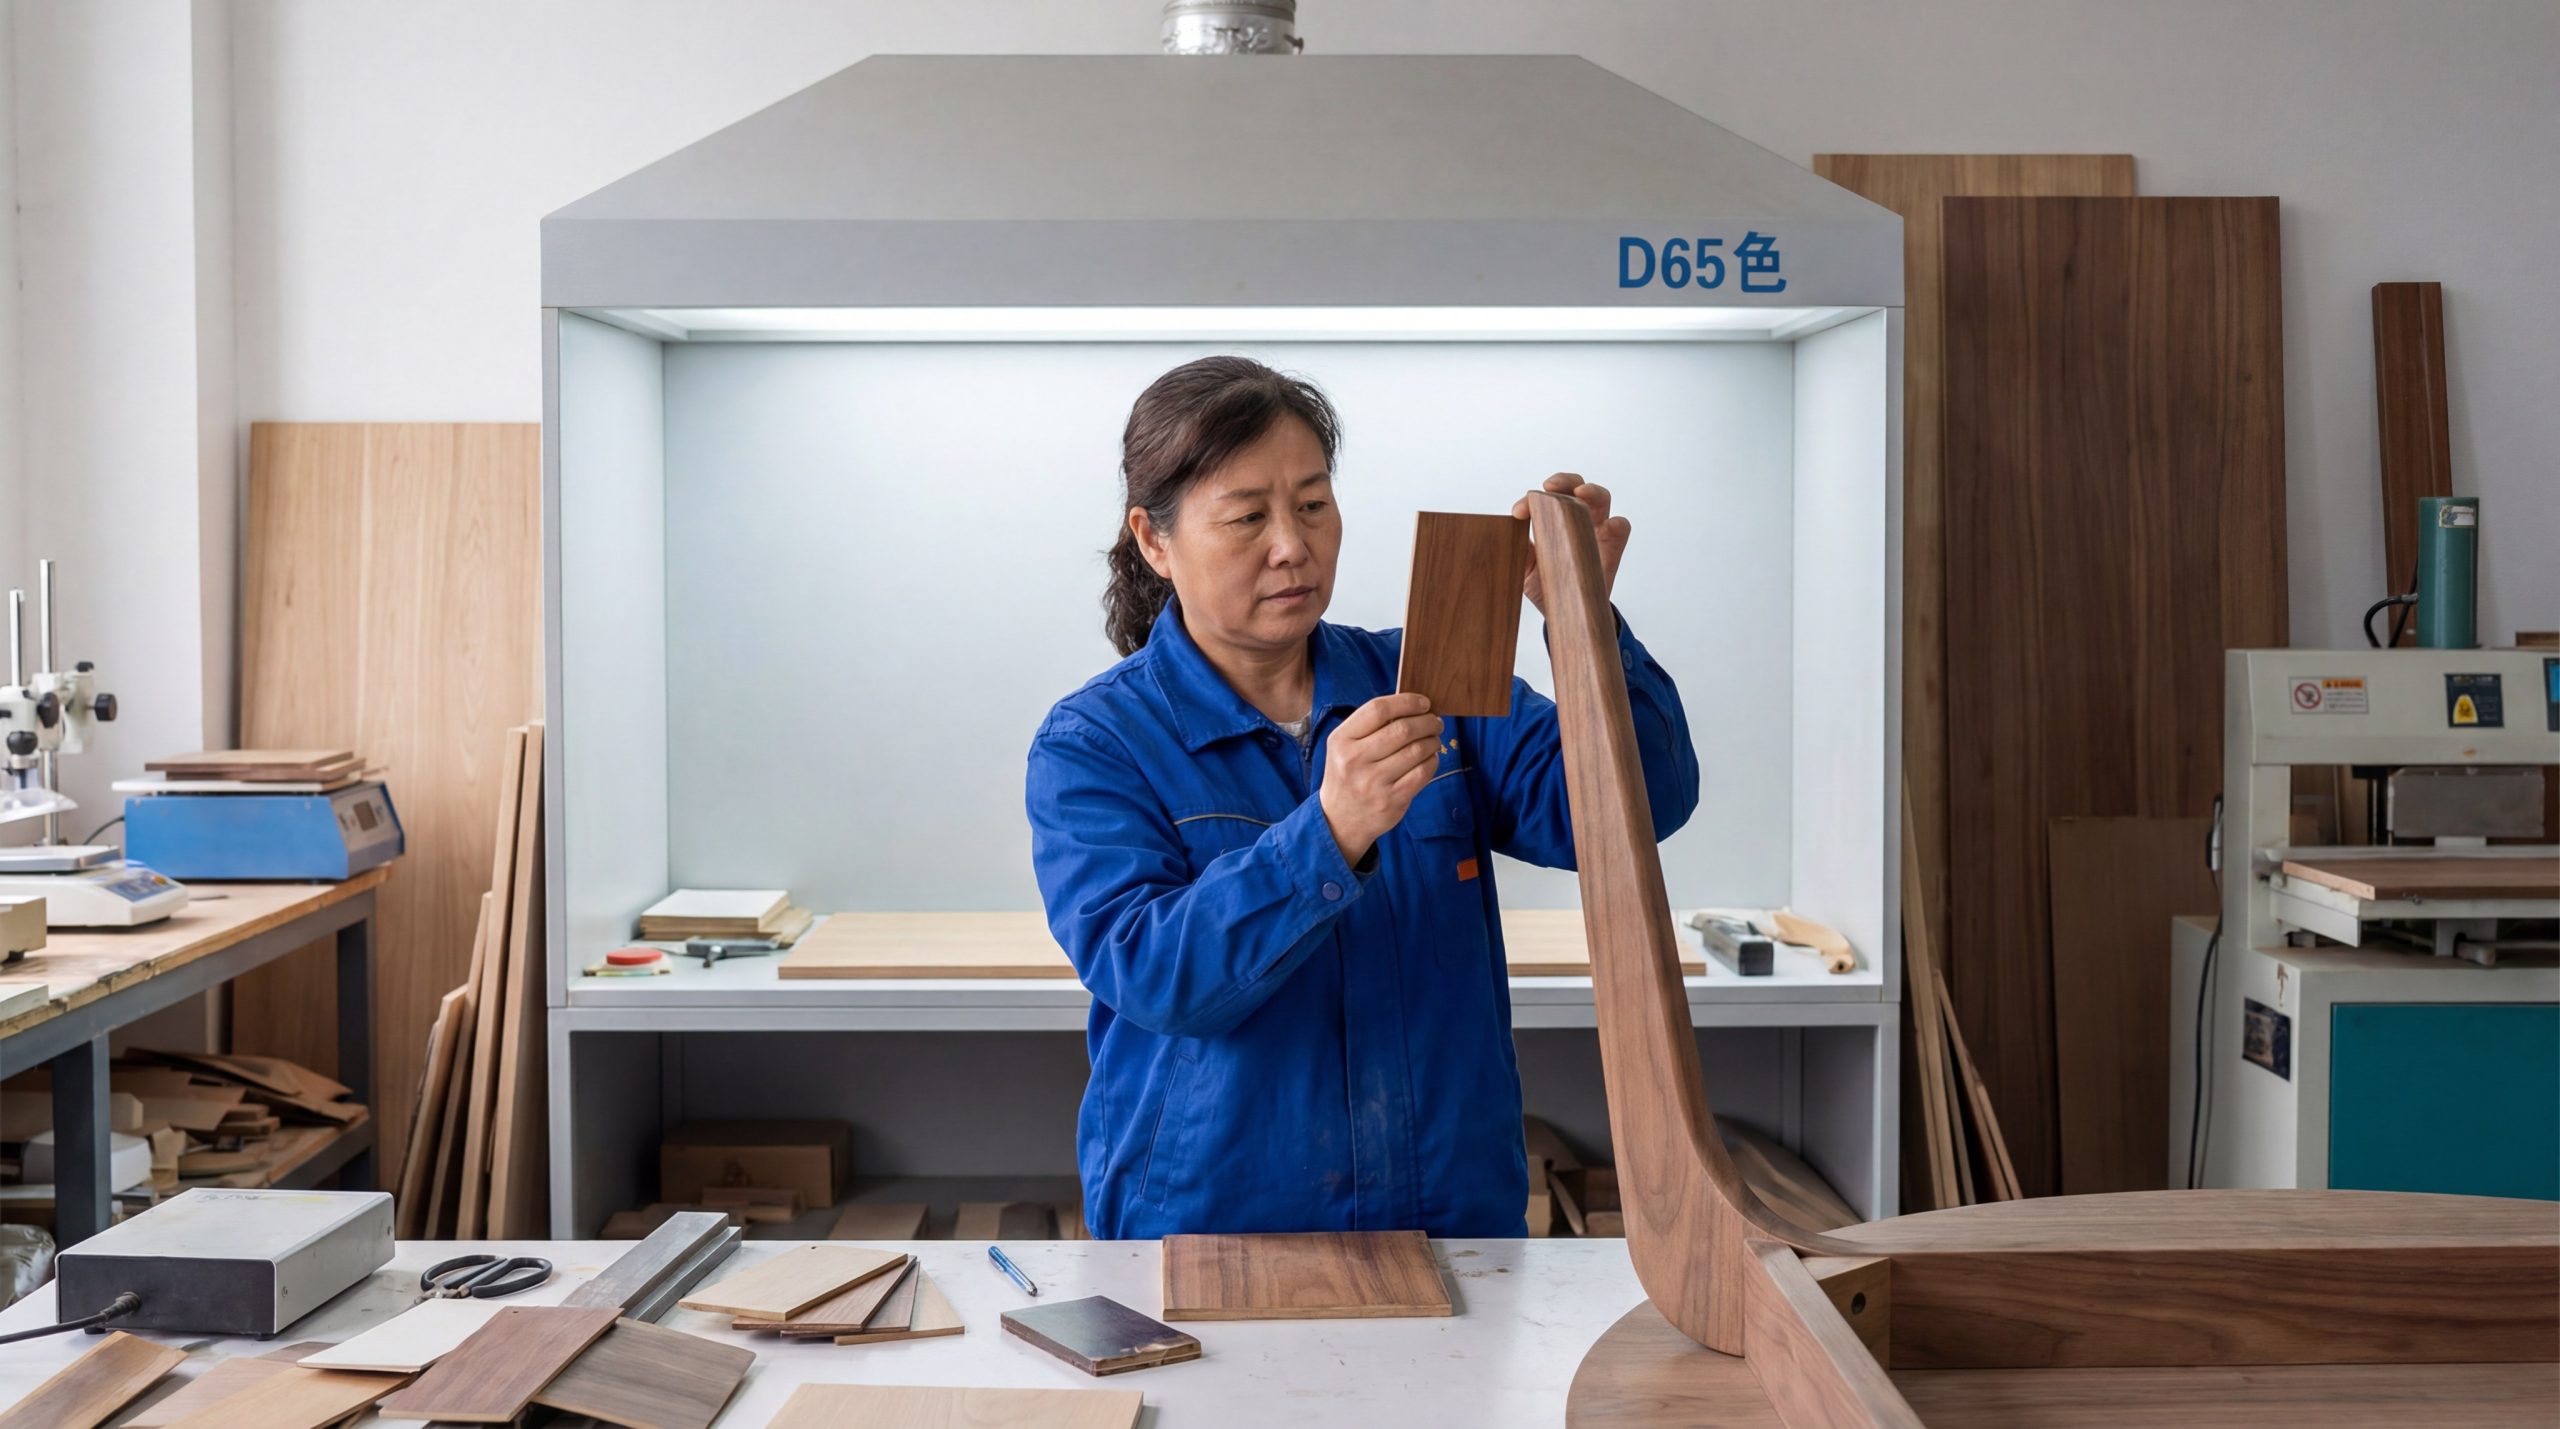
Since wood is a natural product, a single golden sample is an unrealistic benchmark for color, making a “Range Board” essential for a successful furniture sample inspection workflow. You must work with the factory to create a set of panels that show the lightest and darkest acceptable shades, as well as the maximum allowed grain variation, to give the QC team a realistic reference. This prevents the rejection of high-quality pieces that simply have a different grain character than the original prototype.
- Light, Medium, and Dark limit samples for staining.
- Examples of acceptable grain “flow” and natural character.
- Visual definitions of “too many” knots or mineral streaks.
- Comparison under standard D65 lighting conditions.
Monitoring Coating Thickness and Adhesion
The protective layer on your furniture must be thick enough to resist scratches but thin enough to avoid looking like plastic or “orange peeling.” You should use a digital coating thickness gauge to ensure the factory is applying the specified number of microns of lacquer or oil across the entire production run.
Consider this: An uneven coat not only looks bad but also provides inconsistent protection against moisture and UV light, leading to premature fading.
Verifying the Uniformity of the Final Sheen
Gloss levels can drift significantly between batches of lacquer, so you must use a gloss meter to ensure the final sheen matches the approved sample within a +/- 5% range. This is especially important for multi-piece collections where a sideboard and a dining table must look identical when placed in the same room.
Key Takeaway: Natural variation is expected, but color “drift” is a sign of poor production control that must be managed with range boards.
| Finish Parameter | Master Sample | Acceptable Range | Judgment |
|---|---|---|---|
| Color Hue | Golden Oak | +/- 1 Shade | Match Range Board |
| Gloss Level | 20% (Matte) | 15% – 25% | Gloss Meter Check |
| Smoothness | 320 Grit Sand | No visible pits | Tactile Review |
| Transparency | High Clarity | No cloudiness | Visual Depth |
This comparison ensures that the aesthetic appeal of the furniture remains consistent across the entire bulk order.
VIII. Confirming Packaging Durability Standards for Global Shipping

Auditing Packaging Materials and Construction
Even the finest furniture is worthless if it arrives at the customer’s door in pieces, which is why your furniture sample inspection workflow must extend to the shipping carton. You need to verify that the factory is using the specified double-wall corrugated cardboard, high-density EPE foam, and corner protectors that were approved during the packaging design phase. Check the “bursting strength” of the boxes to ensure they can withstand the stacking pressure of a 40ft container during a 30-day ocean voyage.
- Verifying 5-layer or 7-layer corrugated board thickness.
- Checking foam density (e.g., 20kg/m³ vs. 30kg/m³).
- Ensuring the presence of “silica gel” packets for moisture control.
- Verifying the strength of the strapping and sealing tape.
Executing the ISTA Drop Test Protocol
A “drop test” is the most effective way to simulate the rough handling your furniture will face in the e-commerce supply chain. You should require the factory to drop a fully packaged unit from a specific height (based on weight) onto its corners, edges, and faces to see if the internal protection holds up.
The reality is: If the furniture sustains even a minor scratch during a controlled factory test, it will almost certainly be destroyed in a real-world warehouse environment.
Verifying Labeling and Compliance Markings
Correct labeling is a legal requirement in many markets, and errors here can lead to expensive customs delays or fines. You must check that every carton has the correct SKU, country of origin, handling icons (e.g., “This Side Up”), and any required safety warnings like the CARB P2 or TSCA Title VI stickers for formaldehyde.
Key Takeaway: Packaging is the “insurance policy” for your furniture; never cut costs on the materials that protect your investment.
| Packaging Layer | Specification | Production Check | Risk if Substituted |
|---|---|---|---|
| Outer Carton | 275lb Test BC Flute | 200lb Test C Flute | Box Crushing |
| Corner Guards | 50mm Hardboard | 30mm Cardboard | Corner Dents |
| Inner Wrap | 0.5mm PE Bag | 0.2mm Thin Film | Moisture Damage |
| Void Fill | EPE Molded Foam | EPS (Styrofoam) | Brittle Cracking |
This table provides a checklist for ensuring the packaging is robust enough for international transit.
IX. Syncing On-Site Inspections within the Furniture Sample Inspection Workflow
Scheduling the Initial Production Check (IPI)
The best time to catch a systemic defect is during the first 10% of the production run, which is the purpose of the Initial Production Inspection. Within your furniture sample inspection workflow, the IPI allows you to compare the first finished pieces against the golden sample while there is still time to adjust the machines or assembly methods. This proactive approach saves thousands of dollars in re-work and ensures the factory is on the right track from the beginning of the furniture factory capabilities assessment.
- Verifying the raw material batch against the approved swatches.
- Checking the first 10-20 units for dimensional accuracy.
- Confirming that the assembly team is following the approved sequence.
- Identifying any “unforeseen” issues with the mass production tooling.
Implementing the During-Production Inspection (DUPRO)
A DUPRO inspection occurs when about 50% of the order is completed and allows you to monitor the “fatigue” of the production line. You need to ensure that quality isn’t slipping as workers rush to meet deadlines or as cutting tools become dull, which can lead to rougher edges and looser joints.
The point is: A factory that starts strong may finish weak, so you must keep the pressure on during the middle of the run.
Conducting the Final Random Inspection (FRI)
The FRI is your last line of defense before the container is loaded and follows the strict AQL standards you established earlier. You must insist on a random selection of cartons from all parts of the warehouse—not just the ones the factory presents to you—to get a true representation of the entire order’s quality.
Key Takeaway: Inspections are not a sign of distrust; they are a professional validation that ensures both parties are fulfilling their contract.
| Inspection Milestone | Timing (% Done) | Primary Goal | Critical Action |
|---|---|---|---|
| IPI | 10% | Setup Validation | Correct Tooling |
| DUPRO | 50% | Process Monitoring | Check Consistency |
| FRI | 100% | Final Acceptance | Pass/Fail for Shipping |
| Loading Check | During Loading | Shipping Security | Count & Seal |
This summary highlights the chronological checkpoints required to maintain quality throughout the manufacturing cycle.
X. Finalizing the Responsibility Transfer for Mass Production QA
Formalizing the Inspection Report and Approval Sign-off
Once the furniture sample inspection workflow is complete, the findings must be documented in a formal inspection report that is signed by both the inspector and the factory manager. This document becomes the legal record of the quality found and serves as the basis for either releasing the final payment or demanding re-work. Ensure the report includes high-resolution photos of all defects found, no matter how minor, to build a historical “quality profile” for the factory over time.
- Quantitative tally of all minor, major, and critical defects.
- Side-by-side photos comparing defects to the golden sample.
- Inspector’s final recommendation (Pass, Fail, or Pending).
- Signature from the factory representative acknowledging the findings.
Establishing a Corrective Action Plan (CAP)
If the inspection reveals failures, the workflow doesn’t end; it moves into the Corrective Action phase where the factory must explain how they will fix the current batch and prevent the issue in the future. You should not accept a simple “we will do better” but instead require a technical explanation of what changed in the wooden furniture production process to ensure compliance.
Here is why it matters: Without a root-cause analysis, the same defects will likely reappear in your next order, creating a cycle of frustration.
Transferring Ownership to the Logistics Team
The final step in the workflow is the formal handoff from the Quality team to the Logistics team, signaling that the goods are ready for transport. This includes verifying that the container is in good condition, that the loading plan maximizes space while protecting the furniture, and that the shipping seal is applied and recorded correctly.
Key Takeaway: Quality control is a closed loop; it only ends when the customer receives a perfect product and the factory learns how to maintain that standard.
| Defect Category | Acceptance Limit (%) | Typical Examples | Mandatory Action |
|---|---|---|---|
| Critical | 0.65% | Mold, Sharp Edges, Broken Joints | Stop Shipment |
| Major | 2.5% | Wrong Color, Deep Scratches, Wobble | Sort and Repair |
| Minor | 4.0% | Dust in Paint, Small Glue Marks | Monitor for Next Run |
| Packaging | 1.5% | Torn Box, Missing Label | Re-box or Label |
This AQL chart serves as the final judgmental tool for deciding whether an order is ready to leave the factory.
FAQ
Q1: Can I skip the on-site inspection if the golden sample was perfect?
A1: No, because the golden sample is often made by a different team using different methods than the mass production line. Without an on-site inspection, you have no way of knowing if the factory substituted cheaper materials or rushed the assembly process in the bulk order.
Q2: What’s the best way to handle color variance in natural wood furniture?
A2: The most effective method is to create an “approved range board” that shows the lightest and darkest acceptable shades of the wood. This gives the factory a realistic target and provides your inspectors with a clear visual guide to differentiate between natural variation and poor staining.
Q3: How do I know if the factory is actually doing internal QC between my inspections?
A3: Ask to see their internal daily QC logs and look for specific data points like moisture readings or sanding checklists. If the factory cannot provide documented proof of their own quality checks, they are likely relying on your inspections to find their mistakes, which is a major red flag.
Closing Note
Securing your supply chain requires more than just a good design; it demands a rigorous furniture sample inspection workflow that bridges the gap between prototype and production. By quantifying standards and maintaining a presence on the factory floor, you can virtually eliminate the gray zones that lead to defects. If you are ready to elevate your furniture quality, contact us today to discuss how our factory-direct expertise can protect your brand.